Anycubic Photon Mono SE 3D Printer Review
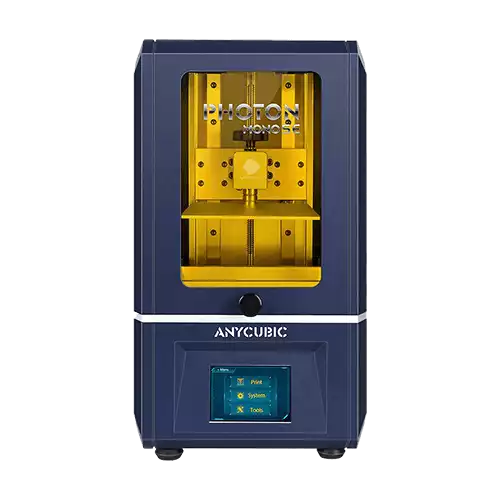
The Photon Mono SE incorporates an all-metal frame with a 6-inch monochrome LCD for faster print speeds and sharp 51 μm resolution. Its gull-wing door adds a ton of convenience, and the 115 x 65 x 160 mm build volume covers most resin printing needs.

Score breakdown
A return to form for the Photon line
However, despite everything going for it, the Photon Mono SE is hard to recommend over more affordable alternatives like the Photon Mono or Elegoo Mars 2 Pro.
These offer nearly identical specs and output quality for significantly less, usually around $140 to $180 cheaper. The added cost is quite hard to justify unless the metal body and unique door design are must-haves.
The Photon Mono SE packs Anycubic's top hardware into an all-metal frame with a magnetic gull-wing door for quick resin changes and lasting printing stability. A 6.08-inch monochrome LCD delivers actual 51 micron XY resolution and layers cure in just one second, thanks to a high-efficiency UV array, pushing print speeds up to 80 mm per hour.
It has a 130 × 78 × 160 mm build envelope and adjustable layer heights from 0.01 to 0.15 mm, which lets you toggle between fine details and rapid drafts. There are dual internal fans with a built-in carbon filter that help keep fumes under control. You can also easily move the printer around as it's just over 8 kg. Priced around $419, it's perfect for any enthusiast who values premium build quality and advanced ventilation.
An Overview of the Anycubic Brand
Anycubic started as a parts supplier in Shenzhen and expanded into one of the most recognized names in consumer 3D printing, with operations in over 200 countries and regions. In the desktop 3D printing industry, Anycubic is a leading manufacturer, and Chinese brands like it account for most of the units shipped worldwide.
The Photon Mono SE is the "heart" of Anycubic's resin printer lineup. It does not claim the top spot, however, which belongs to the Mono X, but it does hit the ideal balance of precision, speed, and price.
Although still firmly in the mid-range segment, the Mono SE has a high-resolution monochrome screen, rapid layer curing, and a build volume that delivers sharp detail and reliable results at a cost you can accept.
Unboxing and Building the Anycubic Photon Mono SE
Building the Photon Mono SE doesn't require much technical expertise. Be that as it may, it's still a hands-on rig.
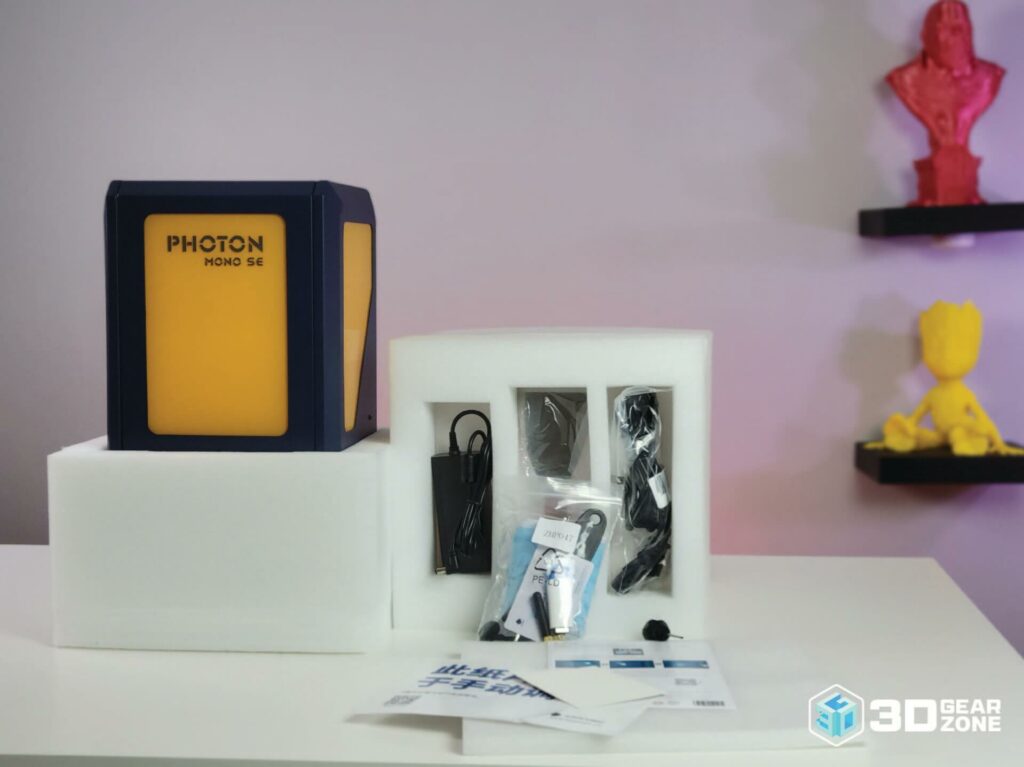
What's Included Inside the Box?
- ▪Magnetic gull-wing doors
- ▪FEP sheet
- ▪Metal resin vat
- ▪Metal build plate
- ▪Leveling knobs
- ▪USB stick loaded with a 10 mm test cube
- ▪Gloves, mask, and funnel
You'll find the printer in foam, with the magnetic door pre-mounted in the box. The metal build plate sits in its slot, prepared for leveling. Below that, the resin vat comes pre-fitted with an FEP film sheet.
Everything else (power brick, USB flashdrive, basic toolkit, and safety gear) is arranged so you can check every piece before starting.
Building the Anycubic Photon Mono SE
Building the Photon Mono SE can be done in under an hour.
First we gathered our tools and parts on a table: the base frame, the build platform, the resin vat with FEP film, the LCD cover, and the bag of screws with allen wrenches. We then slid each acrylic door into its rail until it clicked into place. The frame felt rigid, and everything locked in without needing extra fasteners.
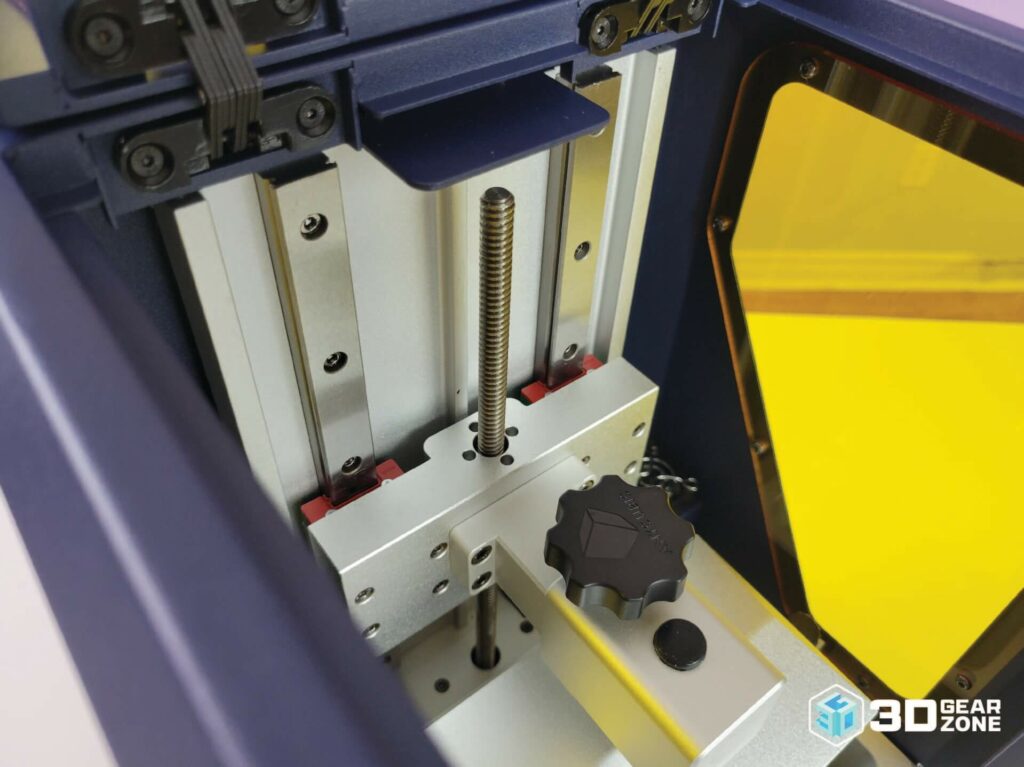
We then attached the build platform to the Z-axis arm using the M5 screws and our allen wrench. After that, we tightened them until finger-firm, then added a half-turn to hold the platform and keep it level.
Next, we fit the FEP film into the resin vat, press it flat against the bottom, and lock it down with all four spring-loaded clamps. Then we aligned the vat's rails with the grooves on the machine's base and slid it forward until it snapped into place.
Loosen the build platform screws until it gently rests on the FEP film, then place the calibration sheet on top. Tighten the screws in a cross pattern until you feel light resistance on the sheet, then back off a quarter-turn for a slight drag.
After that, we plugged in the printer and turned it on. Then, from the touchscreen, we opened the leveling menu.
Finally, we inserted the USB stick, ran the "Z Calibrate" file, and watched that first layer form. If the lines look faint or uneven, tweak the Z-offset by small increments until the layer comes out clean and solid.
Here's the total breakdown:
| Stage | Time Estimate | Primary Task | Tips / Notes |
|---|---|---|---|
| Unboxing & Inventory Check | 5 min | Dense foam can hide small parts | Lay everything out, tick off against the packing list |
| Door & Frame Assembly | 3 min | Seating the gull-wing door flush against the chassis | Press gently until magnets snap; no screws needed |
| Build Plate & Z-Axis Setup | 10 min | Aligning the plate parallel to the LCD screen | Use the paper method: home Z, tighten knobs until slight resistance |
| Resin Vat & FEP Sheet Installation | 5 min | Removing protective film without touching the FEP layer | Peel film back slowly, center vat, then tighten clips evenly |
| Wiring & Power Hookup | 3 min | Routing the power cable through the channel | Tuck the cable into the groove at the rear for a tidy look |
| Firmware Update & Calibration | 12 min | Loading firmware and dialing in Z-offset | Copy the update file to USB, select Update from the menu, then tweak Z in 0.01 mm steps |
Our Initial Impressions on Build Quality
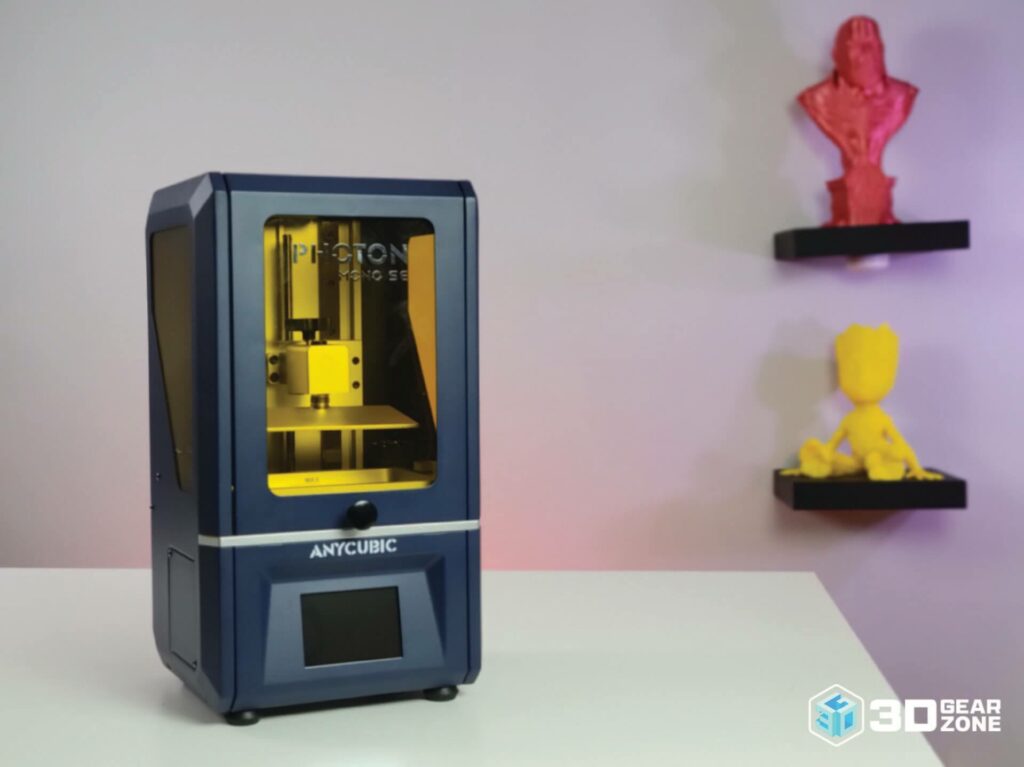
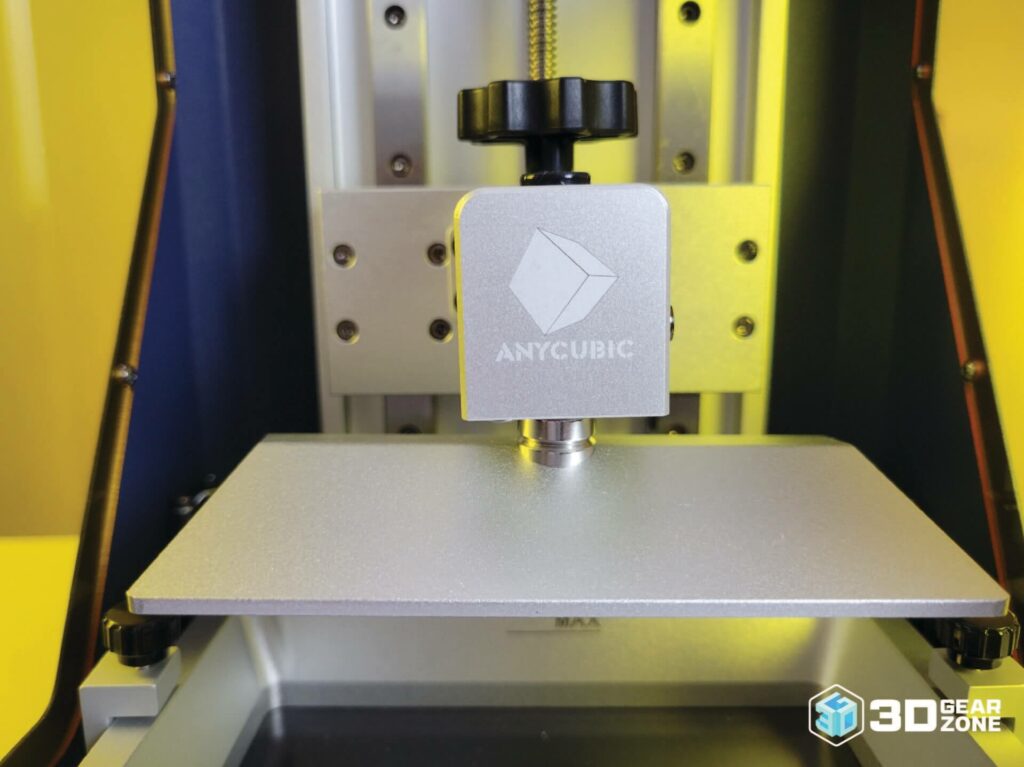
The Anycubic Photon Mono SE is a solid 3D printing machine. The metal body gives it weight, especially compared to flimsier plastic models in the same price range. It does not flex or rattle when you move it around, making it feel more reliable.
The gull-wing door is a welcome touch. It's magnetic, easy to use, and doesn't require hinges or latches. Just lift it, and it remains in place. While the tolerances on the door are not perfect, they work fine.
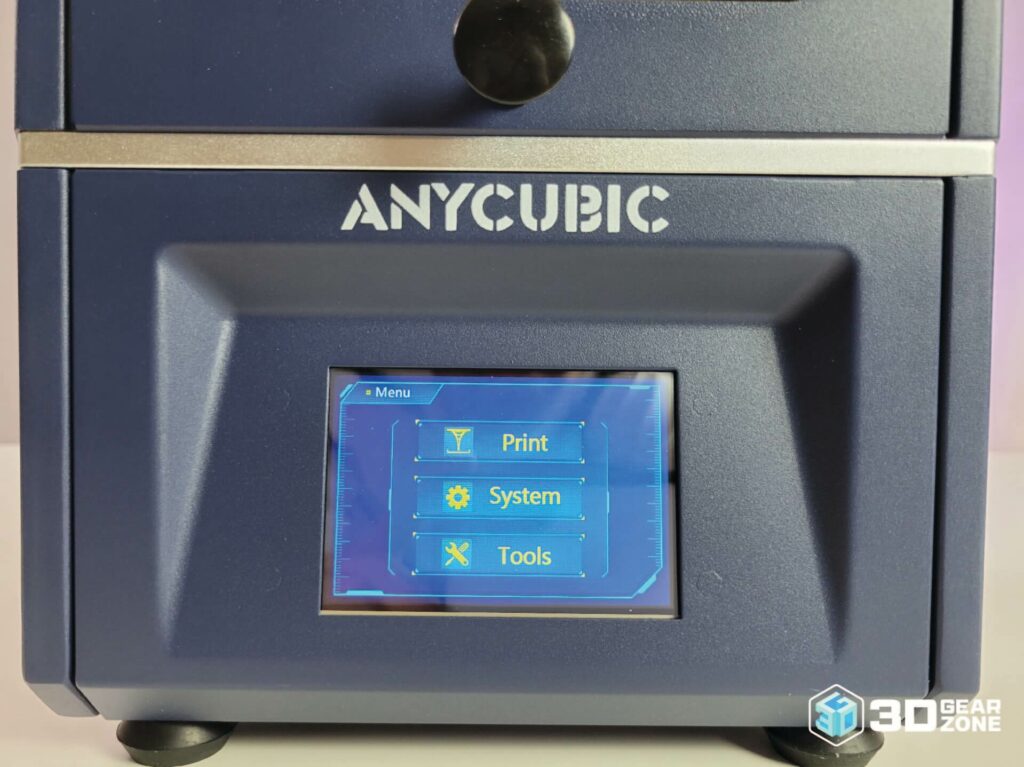
The build plate is thick and locks in tight. Leveling was quick and stayed level after a few runs, which is a good sign. A few knobs and fittings could feel more refined, but they work and hold up under use. In addition, wiring is clean, ports are easy to reach, and the touchscreen boots fast.
Overall, this isn't a hardcore production rig, but it doesn't feel cheap either. If you're looking for something that delivers consistent quality without needing constant tweaks, the Mono SE hits a good balance.
Design, Build Quality, and Technical Specifications of the Anycubic Photon Mono SE
Anycubic positioned the Photon Mono SE as a step up for hobbyists who want better speed and build quality without jumping into pro-level pricing or maintenance.
Key Technical Specifications
- ▪Technology: LCD-based resin (MSLA)
- ▪Build Volume: 130 (l) x 78 (w) x 160mm (h)
- ▪Printer Size: 230mm (l) x 200mm (w) x 400mm (h)
- ▪Weight: ~8kg
- ▪Masking Display: 6.08″ monochrome LCD
- ▪LCD Resolution: 2560 x 1620 (2K)
- ▪XY Resolution: 51 microns
- ▪Light Source: UV LED matrix (405 nm)
- ▪Layer Height: 0.01 – 0.15mm
- ▪Print Speed: Up to 80mm/hr
- ▪Build Plate: Magnetic, textured
- ▪Bed Leveling: Manual (paper method)
- ▪Z-Axis: Linear rail
- ▪Power-Loss Recovery: Yes
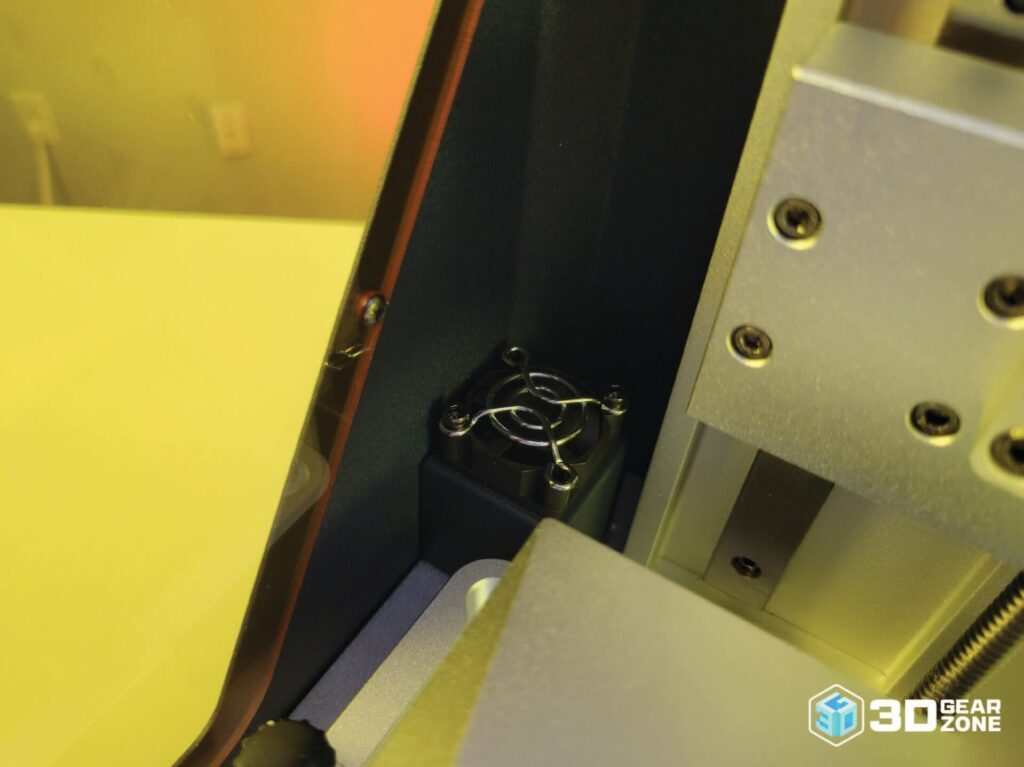
- ▪Resin Filtration: Dual fans with activated carbon filter
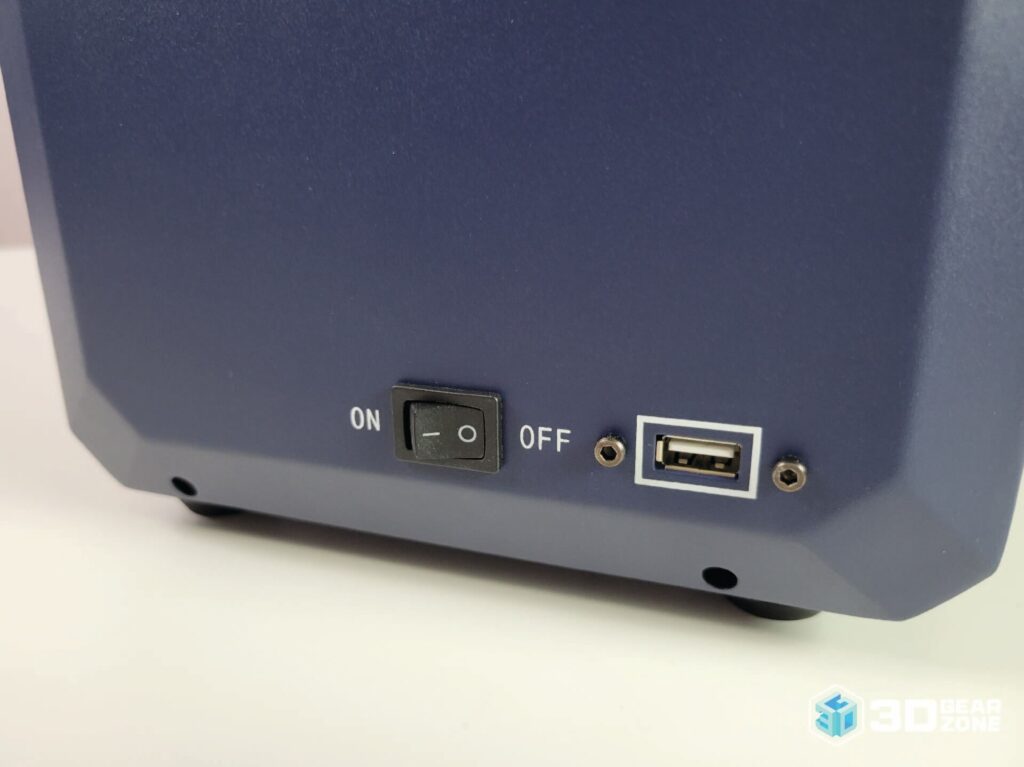
- ▪Connectivity: USB
- ▪Supported Materials: 405 nm UV resins (standard, water-washable, ABS-like, plant-based)
- ▪Operating System: Windows, macOS
- ▪Supported Slicers: Photon Workshop, Lychee, Chitubox
- ▪Supported File Types: STL, OBJ, PWMS / PM3
A Highly Engineered Simplistic Design
The Photon Mono SE's low center of gravity and thick anodized aluminum post keep vibrations to a minimum when the printer fires up. Rubberized feet grip your workbench so you won't find the printer creeping during long cures. Plus, a wide viewing window on the front door gives you a clear view into your print's progress.
On the Photon Mono SE, you get a bright 6.6-inch monochrome panel and straightforward firmware that shows print time, counts layers, and switches to Eco Mode for quiet operation.
Speed Without Compromises on Quality
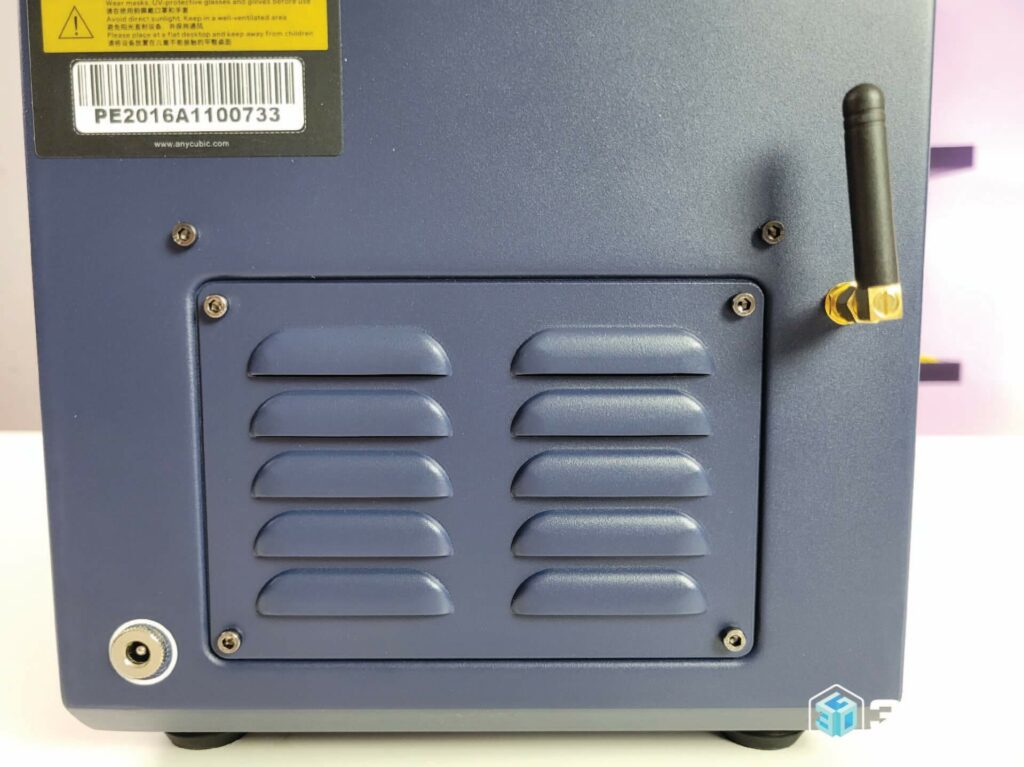
The hinged cover seals tightly and employs an activated carbon filter to reduce resin odor. The spill-proof vat holds resin securely even if you bump the printer mid-print. More importantly, all resin stays contained until you're ready to clean up.
If the UV array overheats, the system shuts down automatically before any damage can occur. Decent internal wiring and sealed connectors mean no loose cables lurking where they can catch drips or debris. You get built-in safeguards without extra routines or settings to learn.
Anycubic Photon Mono SE Print Performance and Quality
The Anycubic Photon Mono SE cures layers fast without sacrificing quality. Delicate details like chainmail, texture, and facial structure come out crisp, even on small, intricate DND miniatures.
Furthermore, the surface finish is smooth, and layer lines are barely noticeable. It's a solid pick if you're doing characters, small-scale prototypes, or anything that needs precision without a lot of cleanup.
This printer can handle aggressive print settings without losing accuracy. The Z-axis rail holds steady through tall prints, so you won't see banding or shifting halfway through a job.
Putting to the Test
The printer handled most of the tests well, with only minor issues.
In the line width and gap test, lines came out clean with sharp corners and no overexposure. A 50 mm miniature bust showed strong detail, especially in the hair and clothing textures.
Layer consistency was also solid. The Print Tower test showed smooth stacking from bottom to top, with no wobbles or layer shifts. Each tower section held its shape, showing the printer can maintain accuracy throughout longer prints.
The Overhang Print was more challenging, but it still turned out well. Steep angles were printed cleanly, and the supports were placed nicely. There was zero sagging, and the general structure held together.
Some small marks were left behind after removing supports, and a few walls had slight texture changes, but nothing major.
| Test Type | Result Highlights | Observations |
|---|---|---|
| Line Width & Gap Test | Clean lines with sharp corners, no overexposure | Solid calibration, slight stringing at corners |
| Miniature Bust | Strong detail, especially in hair and clothing textures | No major issues, excellent resolution, and fine details |
| Print Tower | Smooth layering with strong vertical consistency | Minor vibrations at higher levels, solid dimensional accuracy overall |
| Overhang Print | Clean prints with no sagging or tearing, good support placement | Small marks after support removal, slight texture changes on a few walls |
Firmware and Tuning for the Photon Mono SE
The Anycubic Photon Mono SE runs fine with stock firmware, but you can flash it to unlock more control.
Whether you stick with the default or upgrade, you can adjust key settings like exposure time, lift speed, and retraction. These improvements enhance performance for different resins or specific print jobs.
Getting the Best Print Results
Calibration is key to consistent prints. We started by leveling the bed properly, then we adjusted the exposure times based on the resin we used.
Remember, lift speed tweaks can reduce suction issues, especially on tall prints. Moreover, the FEP film and Z-rod must be kept clean to avoid layer defects.
Quick Adjustments for Top Performance
- ▪Level the bed manually for a uniform first layer.
- ▪Set optimal exposure times based on your resin.
- ▪Fine-tune lift speed and retraction for cleaner prints.
- ▪Test and adjust settings for different model types.
With these seemingly insignificant tweaks, the Photon Mono SE will be fully set to deliver you consistent, sharp 3D prints.
Hardware Upgrades for the Anycubic Photon Mono SE
Although the Anycubic Photon Mono SE is a reliable printer, a few upgrades can significantly improve performance.
- ▪Monochrome LCD Screen: Swapping the stock LCD for a larger monochrome version reduces exposure times and extends the screen's lifespan.
- ▪LED Array Upgrade: Adjusting the LED array's light distribution guarantees more consistent curing, leading to cleaner prints without dark spots or shadows.
- ▪FEP Film Replacement: A new FEP film in the resin vat makes a noticeable difference by improving resin flow and reducing failures due to resin sticking or uneven curing.
Software and Firmware
The Photon Mono SE is compatible with many third-party slicers, such as Cura, PrusaSlicer, Slic3r, Ideamaker, Simplify3D, and Creality. However, we have found AnyCubic's slicer to be hands-down the best as it's specifically designed for the Mono SE.
Mods and Customization
Anycubic's open-source community offers plenty of mods to enhance your printing experience. Custom cooling fans, upgraded build plates, and additional cooling solutions can all improve the quality of prints, especially for larger or more complex models.
Anycubic Photon Mono SE Maintenance, Upkeep, and Reliability
The Anycubic Photon Mono SE is a reliable machine, but regular maintenance is essential to keep it running smoothly. It doesn't require constant attention, but staying on top of a few tasks will extend its life and keep prints coming out sharp.
- ▪Clean the Build Plate: Wipe the build plate with isopropyl alcohol after each print to ensure a clean surface for the next job.
- ▪Check the FEP Film: Inspect the FEP film for any wear or cloudiness, and replace it as needed to keep resin flowing smoothly.
- ▪Grease the Z-Axis Rods: Keep the Z-axis rods clean and lubricated to prevent binding, especially after long print sessions.
- ▪Tighten Screws: Every few weeks, tighten the screws on the frame to maintain stability and prevent vibrations that can affect print quality.
Component Availability and Upgrades
Most parts, like the LCD screen, FEP film, and build plates, are readily available. If something goes wrong, replacements are easy to find, and upgrades are simple to install. You're never stuck with proprietary parts that leave you waiting endlessly for shipping or overpaying.
Common Issues and Fixes
The Photon Mono SE is a great 3D printer, but a few issues can crop up:
- ▪LCD Screen Failure: If the screen starts showing signs of damage or fading, replace it with a new monochrome LCD.
- ▪FEP Film Issues: Over time, the FEP film can get scratched or cloudy, leading to poor resin flow. Swap it out to keep prints clean.
- ▪Uneven Layer Curing: If prints start showing uneven layers, the problem might be with the light source or a misaligned LED array.
Long-Term Performance of the Anycubic Photon Mono SE
With the right maintenance, the Photon Mono SE will continue to produce high-quality prints for a long time. The frame holds up well, and the stepper motors and components are built to last. Keep up with cleaning and checks, and this machine will suffice for all your 3D printing needs.
Anycubic Photon Mono SE vs. Competitors
We're sizing up two top rivals: the Elegoo Mars 2 Pro and the Creality LD-002H.
Both pack a 2K monochrome screen for faster curing and longer panel life, plus magnetic build plates for quick part removal.
Neither model recovers from a power outage, so any cut means losing your print. Their build volumes hover around the Photon Mono SE's dimensions, and all three use linear Z-axis guides for precision.
Compared to those, the Anycubic Photon Mono SE holds a very similar build area at 130 by 78 by 160 mm. Its killer feature is built-in power-loss recovery. It shares the same 2K monochrome screen, magnetic plate, and linear guide.
Priced at $200 to $250 USD, it undercuts the Mars 2 Pro and lines up closely with the LD-002H.
| Photon Mono SE | Elegoo Mars 2 Pro | Creality LD-002H | |
|---|---|---|---|
| Build Volume (mm) | 130 x 78 x 160 | 129 x 80 x 160 | 130 x 82 x 160 |
| Screen Type | Monochrome 2K | Monochrome 2K | Monochrome 2K |
| Power Loss Recovery | Yes | No | No |
| Build Plate | Magnetic | Magnetic | Magnetic |
| Z-Axis Guide | Linear | Linear | Linear |
| Estimated Price (USD) | $200–$250 | $250–$300 | $230–$270 |
The Anycubic Photon Mono SE stands out with its power loss recovery feature, making sure you won't lose prints if the power goes out. While the Mars 2 Pro and LD-002H are excellent options, they lack this important feature.
Our Final Take
The Anycubic Photon Mono SE is a great resin printer, especially for those just starting out or wanting to step up their game. It's easy to maintain, and the magnetic build plate simplifies taking prints off. The community around it is pretty active too, so you'll rarely be stuck for long if something goes wrong.
Overall, the Photon Mono SE delivers excellent quality and reliability without hiccups. It's a fantastic option for anyone looking to get into resin printing or improve their setup.
1. Anycubic.com, "Anycubic 3D Printing" Accessed July 26, 2022.

Scott Gabdullin is a Canadian entrepreneur, investor, and marketing expert who has successfully combined his passion for technology and innovation with a love for adventure and exploration.
Scott brings 12 years of digital marketing experience and a hardcore work ethic to his new passion for 3D printing. If he is not working on this business, he is likely travelling and Overlanding across North America with his wife and 2-year-old son in their Jeep Rubicon.
Read more →