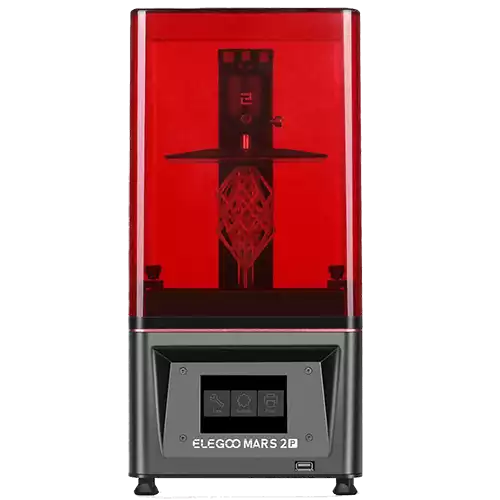
ELEGOO Mars 2 Pro Review
The Mars 2 Pro built on everything that made the original Mars successful and improved it where it mattered: a faster mono LCD, better plate leveling, and stronger hardware. It didn't reinvent resin printing, it just made it more practical, durable, and easier to live with.

Score breakdown
The mono-LCD upgrade that set the bar
When the original Mars line brought high-detail resin printing into the hobbyist realm, there was a clear opportunity to refine the experience. The Mars 2 Pro aimed to be that refinement, and the desktop-resin community adopted it quickly, especially those focused on miniatures, prototypes, and small-batch production.
Launched in mid-2021, it replaced the aging RGB screen with a 2K monochrome LCD, cutting exposure times dramatically and increasing screen longevity. The USB port moved to the front for easier access, and a built-in carbon filter helped reduce fumes in smaller workspaces. None of these were massive changes, but together they made the Mars 2 Pro the new benchmark for entry-level resin printing, not because it changed everything, but because it improved nearly everything just enough.
Unboxing and Building the Mars 2 Pro
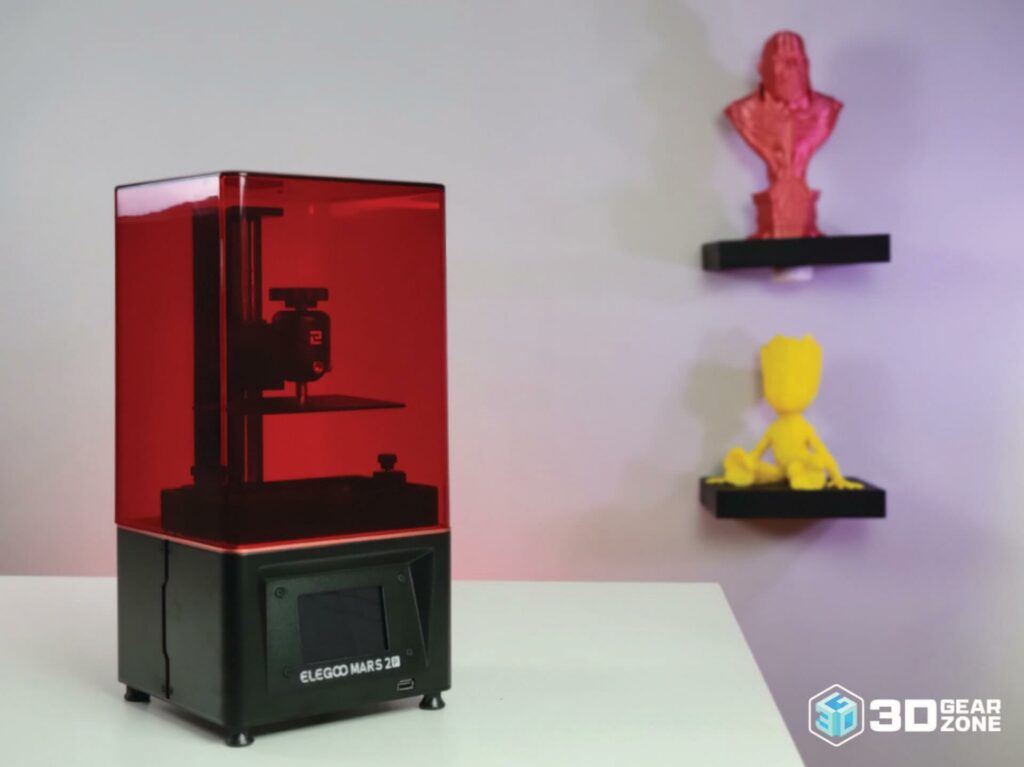
Unboxing is a straightforward, reassuring experience, especially for first-timers. Each component is separated neatly by foam layers, and most of the machine is already assembled. You won't be piecing together rails or motor assemblies: just attach the build-plate arm with the provided Allen keys, slot in the resin vat, and remove the foam spacers and films. Level the plate with the included card, pour resin, plug in the USB stick, and start the test print. Most users go from box to first print in under 30 minutes.
What's in the Box?
- ▪Mars 2 Pro printer (mostly preassembled)
- ▪Sandblasted aluminum build plate
- ▪Resin vat with pre-installed FEP film
- ▪USB stick with test files and slicer
- ▪Metal and plastic scrapers
- ▪Gloves, masks, and resin filters
- ▪Power supply and cable
- ▪Extra FEP film for replacement
- ▪Printed manual with illustrations
| Setup Step | Estimated Time | What to Watch For | Helpful Tip |
|---|---|---|---|
| Unboxing & Placement | 10-15 min | Handling the printer with care | Keep all foam inserts for later transport or storage. |
| Packaging Removal | 5 min | Checking all compartments | Inspect foam layers; some tools are tucked inside. |
| Build Plate Mounting | 5-10 min | A flush, even plate connection | Use the included leveling card to verify alignment. |
| Resin Vat Installation | 2-3 min | Tightening thumbscrews evenly | Don't overtighten; finger pressure is enough. |
| Manual Plate Leveling | 5-8 min | Balancing the plate while tightening | Let the plate rest naturally before securing the screws. |
| Test Print Setup | 5-10 min | Loading resin and verifying settings | Shake resin and double-check exposure times. |
Initial Impressions
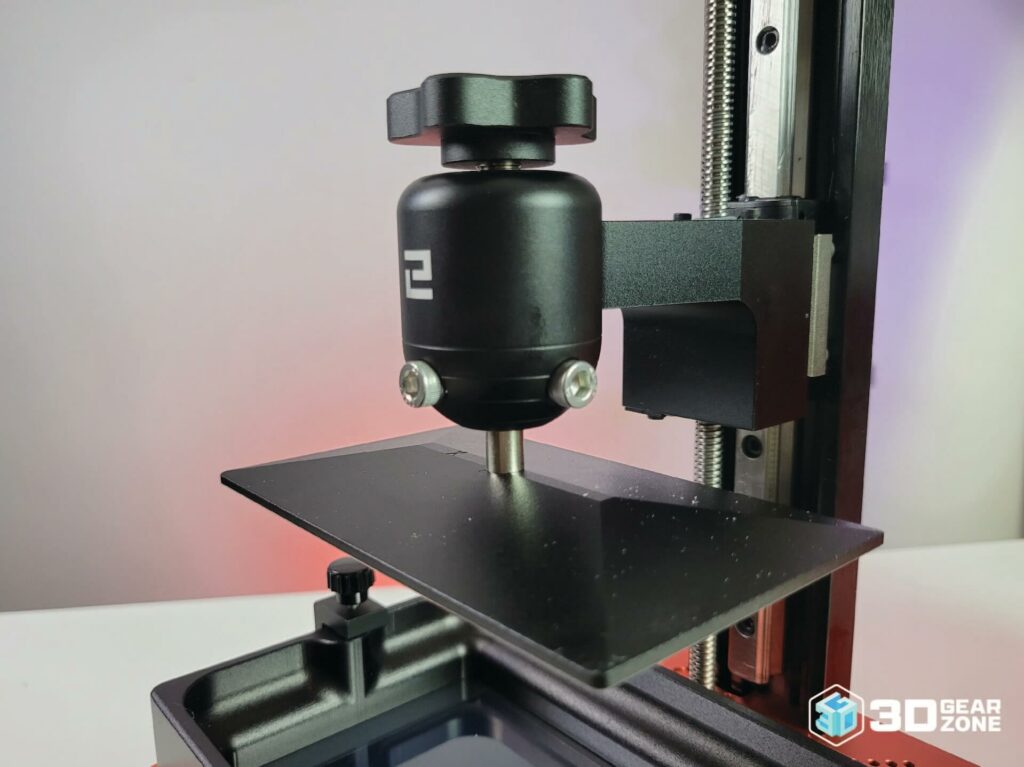
The Mars 2 Pro strikes a smart balance between simplicity and polish. It doesn't feel like a budget printer trying to mimic a premium product; it feels like a well-thought-out tool built for dependable work. The rigid aluminum body, clean-gliding single linear rail, and grippy sandblasted build plate improve adhesion without sprays or adhesives.
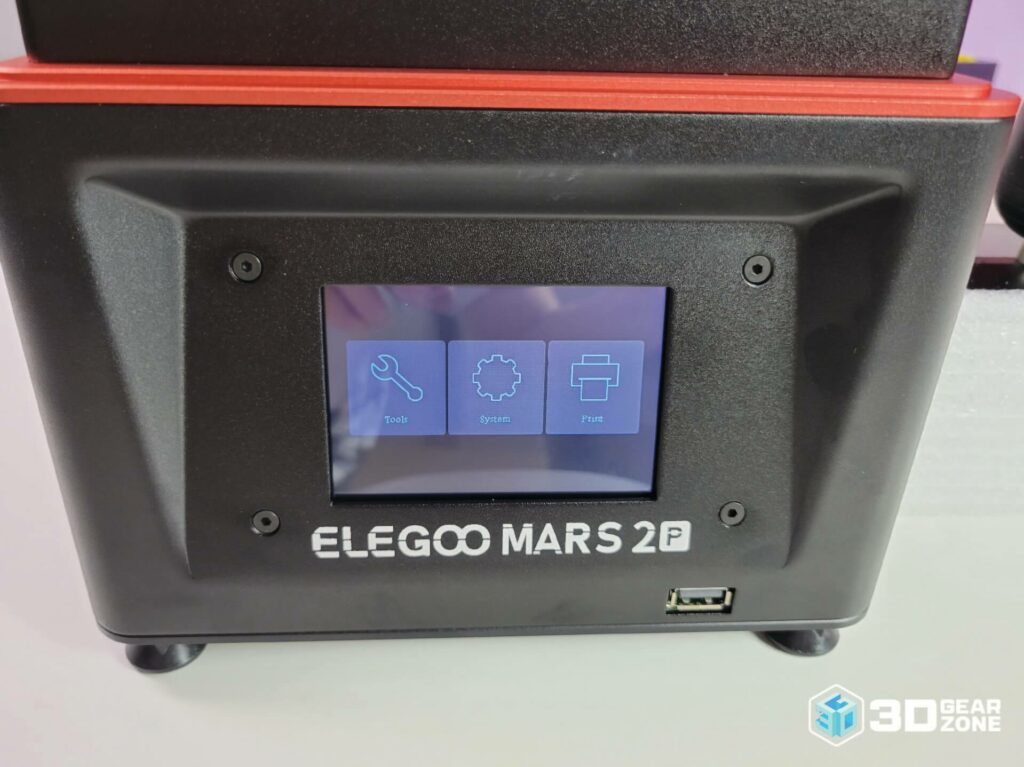
The lead screw arrives pre-lubricated and well aligned, cutting the Z-wobble that plagues other budget resin machines. The touchscreen is sharp and responsive, limited to the features you actually need. Even the manual leveling helps new users develop a feel for the machine: how to read proper plate pressure, interpret early adhesion, and troubleshoot misalignment. That familiarity pays off later.
Design and Technical Specifications
The Mars 2 Pro was engineered to balance fine detail with ease of use. Instead of the RGB screen used in earlier machines, it features a 6.08″ monochrome LCD with 2K resolution (1620 × 2560), which cuts layer cure times to 1.5-2.5 seconds and extends the LCD's life by hundreds of hours. Combined with its UV LED matrix and 0.05 mm XY resolution, it tackles detailed miniatures and intricate prototypes with ease.
The 129 × 80 × 160 mm build volume gives slightly more room than earlier Mars models without growing the footprint. A rigid aluminum frame, single linear rail, and anti-backlash nut on the Z-axis prevent wobble on taller builds, and a built-in carbon filter, front USB port, and 3.5-inch touchscreen round out a thoughtful package.
Specs at a Glance
- ▪Build Volume: 129 x 80 x 160mm
- ▪XY Resolution: 50 µm (1620 x 2560)
- ▪LCD Type: 6.08″ 2K monochrome
- ▪Layer Cure: 1.5-2.5s per layer
- ▪Light Source: UV LED matrix, 405nm
- ▪Z-Axis: Single rail + anti-backlash nut
- ▪Display: 3.5″ color touchscreen
- ▪Connectivity: Front USB
- ▪Slicer: ChiTuBox, Lychee
- ▪Odor Control: Activated carbon filter
- ▪Frame: Full aluminum, damping feet
Print Performance and Quality
If your priority is consistent results with sharp detail, the Mars 2 Pro delivers. Its 50-micron XY resolution allows fine surface textures, clean support points, and solid definition on everything from 28 mm miniatures to micro-mechanical prototypes. With the plate leveled and exposure tuned, you get dependable, clean prints without constant adjustment.
Newer machines offer 4K or 8K, but most users won't see a dramatic difference at this scale unless printing extremely small parts under magnification. What stands out is reliability: it rarely needs releveling, and once your slicer settings are dialed in, quality holds over long runs. The mono LCD speeds up prints versus RGB models without sacrificing consistency, and uniform light distribution gives smooth sidewalls and great vertical alignment.
Test Print and Benchmark Results
| Test Type | Result Highlights | Observations |
|---|---|---|
| Dimensional Accuracy | Within 0.1 mm of model dimensions | Minor shrinkage with standard resins; consistent scaling. |
| Overhang Test | Clean performance to 60-65° | Slight curling at extremes without custom supports. |
| Fine Detail Print | Excellent resolution on miniatures | Sharp ridges, smooth textures, readable micro-text. |
| Tall Print Stability | No visible leaning or Z-wobble | Linear rail and anti-backlash nut hold up on long jobs. |
| Layer Uniformity | Smooth vertical surfaces | Minimal stepping or artifacts even on thin walls. |
Firmware, Tuning, and Calibration
The Mars 2 Pro ships with reliable, responsive firmware that prioritizes usability, giving direct access to move the plate, start a print, and adjust basic settings without digging through submenus. Updates are painless: download from ELEGOO's support page, copy to a USB drive, and the printer handles the rest on startup.
The mono screen cures faster, but you'll still tune exposure to your resin: start from the manufacturer's recommendation, then fine-tune bottom-layer exposure and lift speed for adhesion and detail. Its manual four-point leveling may seem old-school, but once dialed in, many users go weeks or months without re-leveling, a consistency that's especially appreciated for batch runs.
Possible Upgrades for the Mars 2 Pro
The Mars 2 Pro performs well out of the box, but a few thoughtful upgrades improve workflow, quality, and maintenance:
- ▪Premium FEP film or a better resin vat
- ▪Flexible or magnetic build-plate system
- ▪Custom enclosure or light shield
- ▪UPS backup to survive power loss
- ▪Z-axis stabilizer or anti-backlash nut
- ▪Wash-and-cure station for finishing
Maintenance and Common Issues
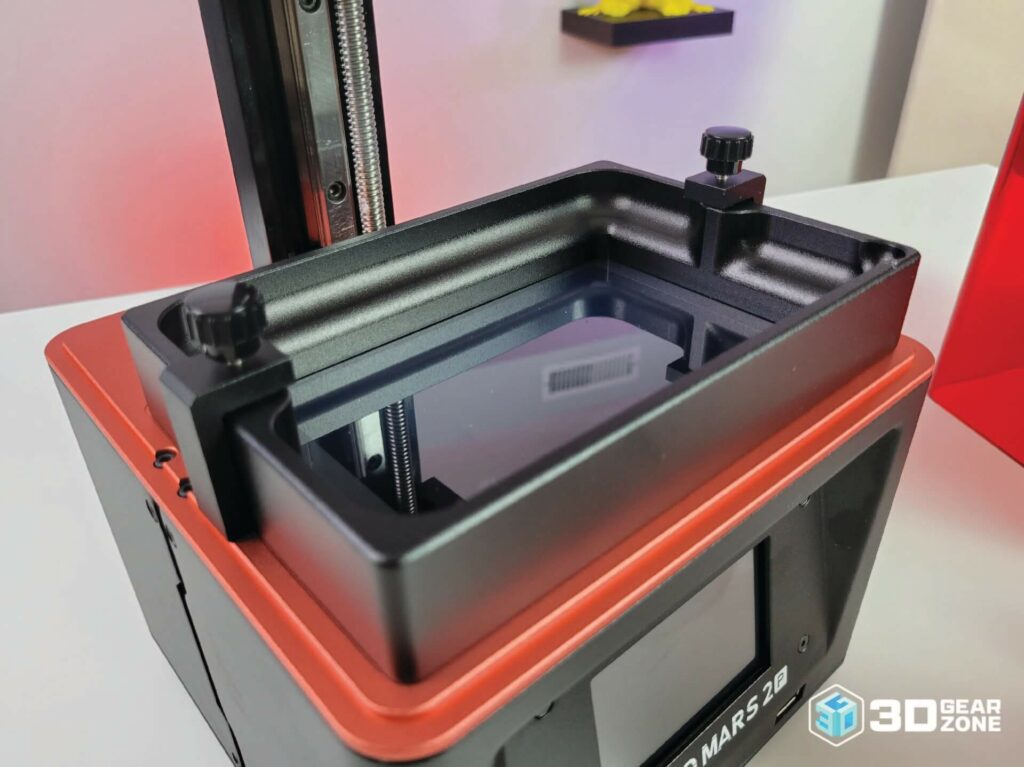
The Mars 2 Pro rewards a little regular care. After each print, wipe cured fragments off the plate and clean it with 90%+ isopropyl alcohol, then filter unused resin back into the bottle to catch scraps that could damage the FEP film. Check the FEP every few prints and swap it at the first sign of scratches or clouding. The common issues and their fixes:
- ▪Prints not sticking to the plate — re-level with the card, tighten all four screws, and lightly sand or clean the plate.
- ▪Layer lines or shifts — clean and lubricate the Z-axis lead screw; dust and resin residue cause faint banding.
- ▪Foggy or uneven curing — usually worn FEP or a fading LCD; replace the film or check the screen.
- ▪Touchscreen freezes or USB errors — reseat the ribbon cable; use a FAT32 drive under 32 GB.
Comparisons with Alternative Models
In the mid-size desktop range, the Mars 2 Pro sits in the sweet spot of affordability, performance, and reliability. Here's how it stacks up against close rivals.
| ELEGOO Mars 2 Pro | Anycubic Photon Mono | Creality Halot-One Plus | Phrozen Sonic Mini 4K | |
|---|---|---|---|---|
| Build Volume | 129 × 80 × 160 mm | 132 × 80 × 165 mm | 143 × 90 × 175 mm | 134 × 75 × 130 mm |
| Screen | 6.08″ mono | 6.23″ mono | 7.9″ mono | 6.1″ mono |
| XY Resolution | 50 µm (2K) | 35 µm (4K) | 43 µm (4K) | 35 µm (4K) |
| Price Range | $180 – $230 | $209 – $249 | $239 – $289 | $259 – $299 |
The mono LCD is the Mars 2 Pro's big strength, improving curing speed and lifespan over RGB models. The Anycubic Photon Mono and Phrozen Sonic Mini 4K offer sharper resolution, but the Mars 2 Pro feels more dependable job to job and more forgiving for beginners. The Creality Halot-One Plus has a bigger screen but a more locked-in ecosystem; the Mars 2 Pro's ChiTuBox compatibility means easy access to community profiles and tweaks.
Our Final Verdict
If you want a resin printer that gets the job done without drama, the Mars 2 Pro still holds its ground in 2025. It may not have the fastest screen or Wi-Fi, but it nails the basics: consistent print quality, a plate that holds its level for weeks, and an ecosystem with tons of support, slicer profiles, and replacement parts.
For hobbyists, modelers, and anyone new to resin, the Mars 2 Pro is often the printer that builds your confidence instead of testing your patience. It teaches you the fundamentals without overwhelming you, and even if you move on to a bigger setup later, it makes a fantastic, reliable secondary unit. If you want a printer that just works and doesn't nickel-and-dime you with constant tweaks, it's still one of the safest bets on the shelf.

Scott Gabdullin is a Canadian entrepreneur, investor, and marketing expert who has successfully combined his passion for technology and innovation with a love for adventure and exploration.
Scott brings 12 years of digital marketing experience and a hardcore work ethic to his new passion for 3D printing. If he is not working on this business, he is likely travelling and Overlanding across North America with his wife and 2-year-old son in their Jeep Rubicon.
Read more →