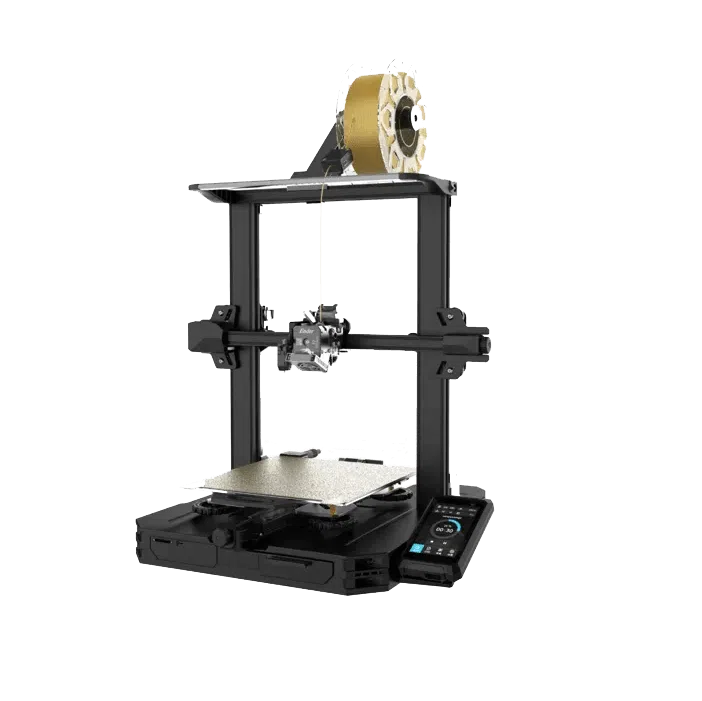
Creality Ender-3 S1 Pro FDM 3D Printer Review
The Creality Ender-3 S1 Pro is a well-known desktop FDM 3D printer. Released in 2022, it builds on the success of Creality's Ender-3 series, standing out by including several popular features formerly available only as add-ons.

Score breakdown
Feature-rich and dependable
By offering these upgrades right out of the box, it became a reliable and user-friendly option for those who wanted better printing without spending more.
This review features the 3D printer, which has been kindly provided to us by the manufacturer for the purpose of this review. While the manufacturer has supported us by supplying the printer, they have not influenced the content of this review in any way. Our assessments and observations are entirely our own, and we have conducted our usual thorough testing to ensure we provide an accurate evaluation of the product. At 3DGearZone, we are committed to transparency and honesty, ensuring that our audience can trust the content we produce.
The Creality Ender-3 S1 Pro is a capable, well-regarded 3D printer in the FDM category. Its balance of performance and ease of use has made it a popular choice among users who want dependable results without a steep learning curve.
One of Ender-3 S1 Pro's main strengths is a precise material feeding system that handles various filament types, including those that are harder to work with. The printer also includes an automatic bed leveling system that cuts down on the time and effort needed to get the first layer right. The machine's solid frame adds to its reliability by lessening movement during printing, which matters for long or detailed jobs.
An Overview of the Creality Brand
Creality, officially Shenzhen Creality 3D Technology Co, was formed in Shenzhen back in 2014. Despite kicking things off with a small team and workshop, the company soon became a significant presence in the consumer 3D printing market. Their breakthrough came with models like the CR-10 and Ender-3, which made 3D printing more accessible to hobbyists and enthusiasts around the world, thanks to low cost and solid performance.
Today, Creality leads the entry-level 3D printer segment, often topping unit shipment charts. The company has moved from kits to various FDM and resin printers, 3D scanners, and even laser engravers. By keeping prices low and updating their models regularly, it has maintained a firm hold on the market.
The Creality Ender-3 S1 Pro shows this progress in action. However, looking beyond the S1 Pro, Creality keeps making faster, more integrated, and user-friendly machines, focusing on making 3D printing easy and fun for a growing global user base.
Unboxing and Building the Creality Ender-3 S1 Pro
Unboxing the Creality Ender-3 S1 Pro starts with lifting a sturdy brown box weighing around 20 pounds. Inside, foam inserts hold each component in place, helping protect parts during transit. Unlike older, more DIY-heavy kits, this printer conveniently comes pre-assembled, which means a faster unboxing experience.
What's in the Box?
- ▪Main Printer Body
- ▪"Sprite" Full-metal Dual-gear Direct Extruder
- ▪Spring Steel PEI Magnetic Build Plate
- ▪4.3-inch Color Touchscreen
- ▪CR Touch Automatic Bed Leveling Sensor
- ▪LED Light Strip
- ▪Filament Run-out Sensor
- ▪Dual Z-axis Motors and Leadscrews
- ▪32-bit Silent Motherboard
- ▪Power Supply
- ▪Tools for Assembly and Maintenance
- ▪Side Cutters, Metal Scraper, Nozzle Cleaner
- ▪Spare Brass Nozzle
- ▪Extra Z Limit Switch
- ▪Full-sized SD Card & USB Adapter
- ▪Small Sample of White PLA Filament
- ▪Filament Holder Assembly
- ▪Nuts, Bolts, Screws, and Washers
- ▪Power Cable
- ▪Creality Ender-3 S1 Pro User Manual
Building the Machine
Here's a step-by-step look at unpacking and setting up the Ender-3 S1 Pro:
| Stage | Time Estimate | Key Challenges | Tips / Notes |
|---|---|---|---|
| Unboxing & Initial Assembly | 10-20 minutes | Identifying and securing all pre-assembled components (gantry, hotend, screen). | The Ender-3 S1 Pro is semi-assembled, but careful attention is needed for gantry alignment and hotend attachment. Refer to the user manual or an assembly video. Choose a level, stable surface. |
| Removing Shipping Protection | 2-5 minutes | Locating all zip ties, foam, and plastic film. | Plug the power adapter into the printer and a grounded electrical outlet, then insert the provided SD card for initial prints and firmware updates. |
| Connecting Power & USB/SD Card | 2-5 minutes | Identifying the correct voltage switch (if applicable) and ports. | Plug the power adapter into the printer and a grounded electrical outlet. Ensure the USB port for file transfer is easily accessible. |
| Initial Power-On & Onboarding | 5-10 minutes | Navigating the touchscreen interface and performing initial checks. | Flip the power switch. The printer's touchscreen will boot up. It might guide you through language selection and a self-test. Listen for any unusual noises during movement. |
| Attaching & Leveling Build Plate | 5-10 minutes | Achieving proper Z-offset and good first-layer adhesion. | The Ender-3 S1 Pro has CR-Touch auto-leveling. Run this feature from the touchscreen. |
| Loading Filament | 3-5 minutes | Proper insertion into the extruder and ensuring it reaches the hotend. | Cut the end of your filament at an angle. Press the lever on the extruder to open the gears, then feed the filament past the sensor and into the direct drive extruder until you feel it stop at the hotend. Heat the nozzle and gently push the filament until it comes out smoothly. |
| Slicer Software & Print Preparation | 15-30 minutes (initial) | Downloading, learning interface, and model setup. | Get Creality Print or a popular program like Cura or PrusaSlicer. Set up the correct printer profile for the Ender-3 S1 Pro. Learn how to bring in your 3D models, turn them correctly, add supports (if needed), pick your print settings, and prepare them for printing. Save the file to your SD card. |
Our Initial Impressions on Build Quality
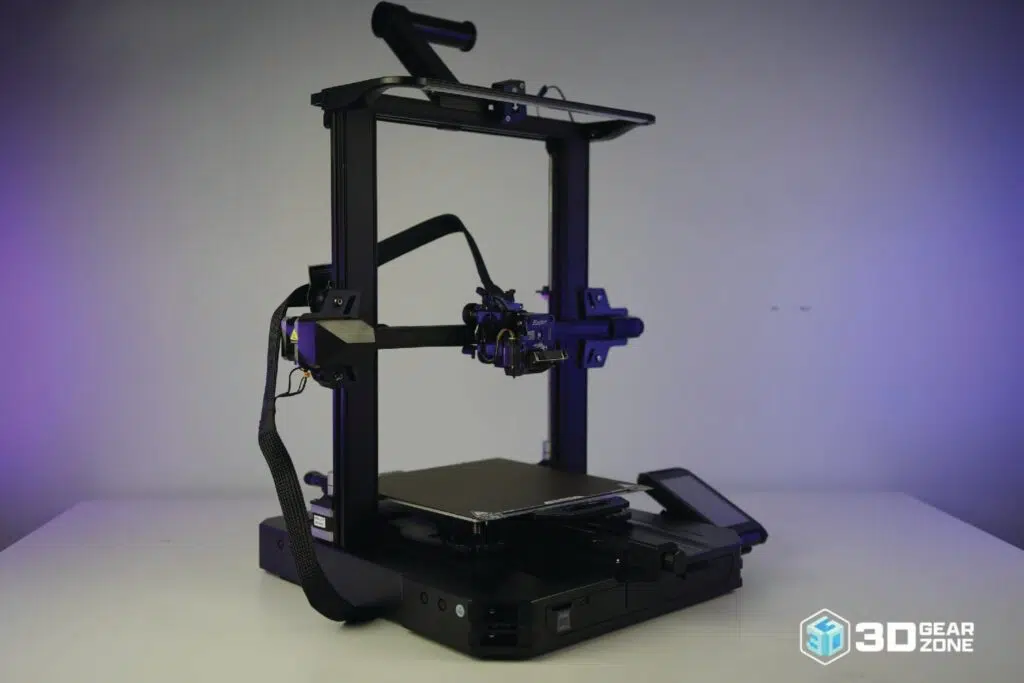
Our first look at the Ender-3 S1 Pro's build quality is positive, especially for its price range. Its quality stands out as you handle the main parts during unboxing. The printer's aluminum frame feels sturdy and forms a strong base for its movements during operation. Once assembled, minimal wobble in the gantry shows the effort Creality put into making it rigid, which is necessary for consistent prints.
Moreover, parts like the direct drive extruder assembly and the print bed carriage seem well-built and move smoothly with little resistance or play.
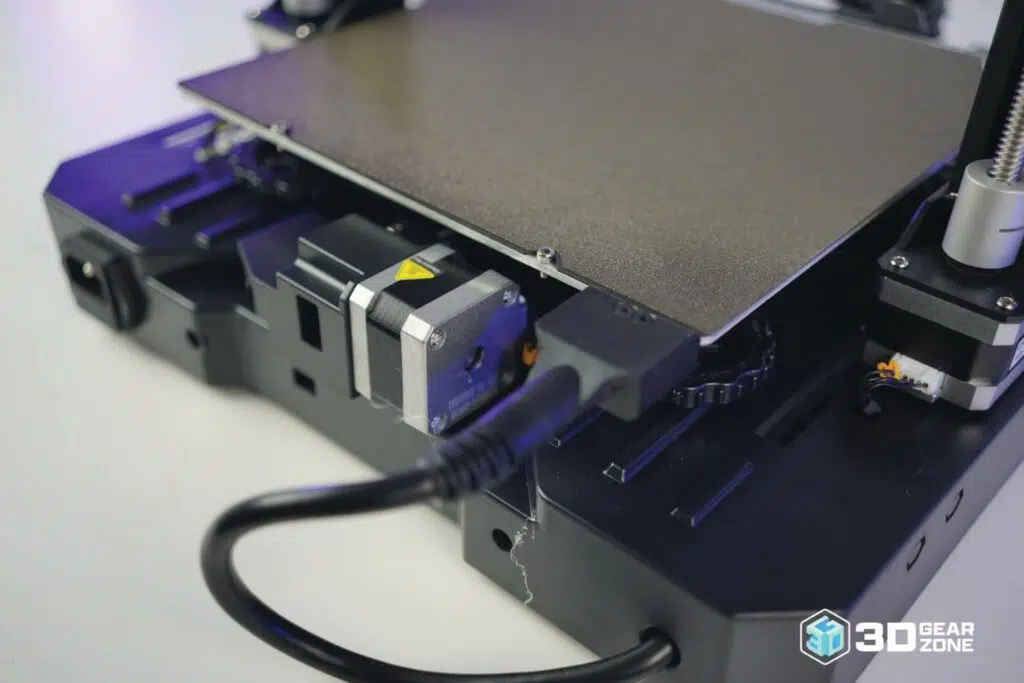
Given its price point, the Ender-3 S1 Pro is unsurprisingly not a heavy-duty printer. Even so, the quality of its parts and the organization of its cables are improved over earlier budget models.
Needless to say, a few minor issues stand out. For instance, small gaps in some plastic covers suggest that molding could be better. In addition, some pre-assembled wires are stiff and might cause routing challenges later on if you make changes. These flaws aren't significant, but fixing them could make the printer feel more premium.
Design and Technical Specifications
The Creality Ender-3 S1 Pro follows a focus on making 3D printers that are user-friendly and compatible with more materials. Its frame uses sturdy aluminum extrusions for a stable print platform. Meanwhile, dimensions measure about 490 x 455 x 625 mm (W x D x H), so it fits nicely on a desktop despite its size.
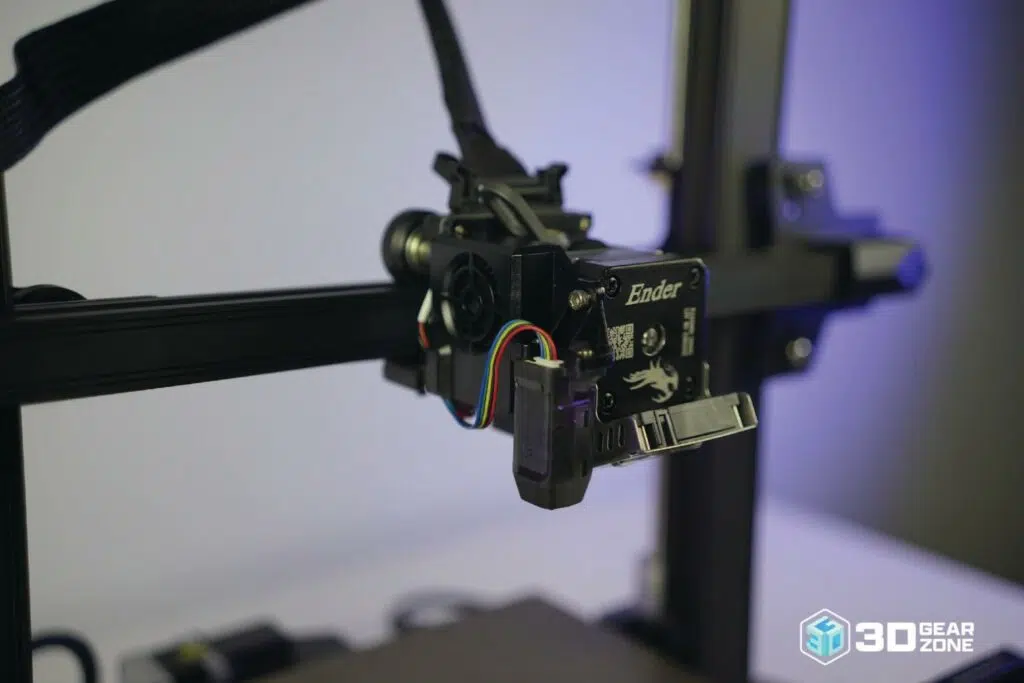
At its heart, the S1 Pro has a "Sprite" full-metal dual-gear direct extruder placed right above the hotend. That setup gives accurate control over filament feeding, especially for flexible materials like TPU, and guarantees strong extrusion force.
The hotend heats up to 300°C, expanding filament options from standard PLA to ABS, PETG, and a range of high-temperature engineering plastics. Plus, the build volume measures 220 x 220 x 270 mm, leaving plenty of room for various projects.
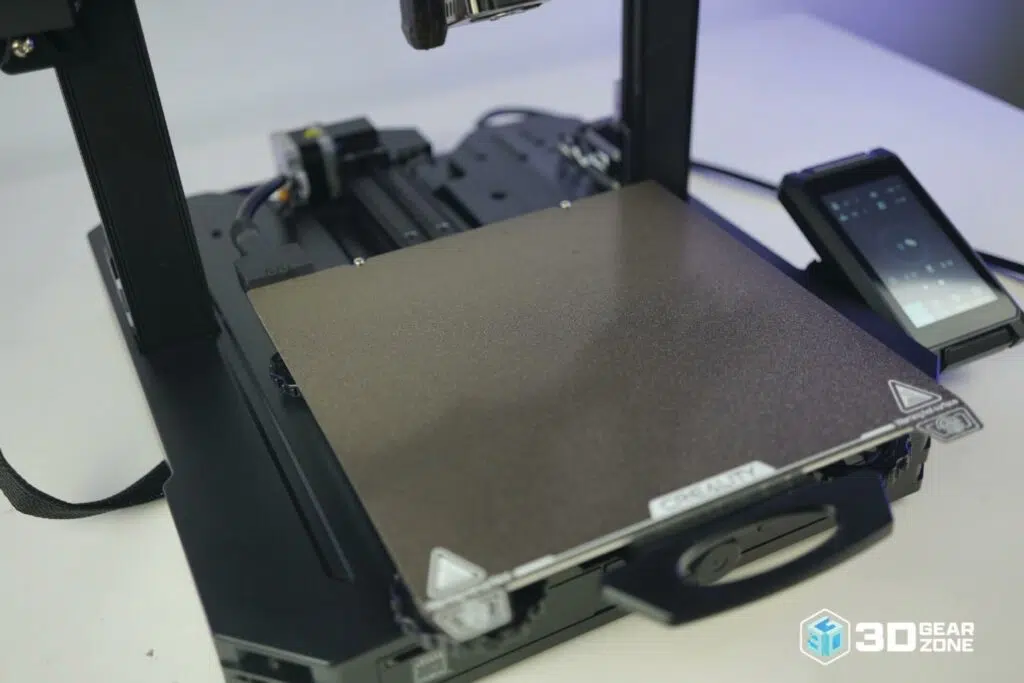
For bed leveling, the Creality Ender-3 S1 Pro comes with a CR-Touch 16-point automatic leveling system, which maps the print surface without manual effort. Prints sit on a flexible PEI-coated spring steel magnetic build plate that grips well when hot and lets you pop parts off easily by bending the sheet once it cools.
A 4.3-inch color touchscreen provides a simple interface for adjusting settings and keeping an eye on prints. The 32-bit silent mainboard cuts down on noise during operation, and a filament run-out sensor and power loss recovery pause prints if something goes wrong. Finally, the 3D printer can achieve top print speeds up to 160 mm/s.
Key Technical Specifications
- ▪Molding Technology: Fused Deposition Modeling (FDM)
- ▪Build Volume: 220 x 220 x 270 mm
- ▪Machine Dimension: 490 x 455 x 625 mm
- ▪Net Weight: 8.7 kg
- ▪Printing Speed: 160 mm/s
- ▪Layer Height: 0.1-0.35mm
- ▪Filament Diameter: 1.75 mm
- ▪Nozzle Diameter: 0.4 mm
- ▪Extruder: "Sprite" full-metal dual-gear direct extruder with 1:3.5 gearing
- ▪Slicing Software: Creality Print, Cura, Repetier-Host, Simplify3D
- ▪Build Surface: Spring Steel PEI Magnetic Build Plate
- ▪Supported Filament: PLA, ABS, WOOD, TPU, PETG, PA
- ▪Nozzle Temperature: Up to 300°C
- ▪Heat Bed Temperature: Up to 110°C
- ▪Leveling Mode: CR Touch Automatic Leveling
- ▪Display: 4.3-Inch Color Touch Screen
- ▪Motherboard: 32-bit Silent Motherboard
- ▪Resume Printing: Yes
- ▪Filament Sensor: Yes
- ▪Rated Power: 350W / 24V
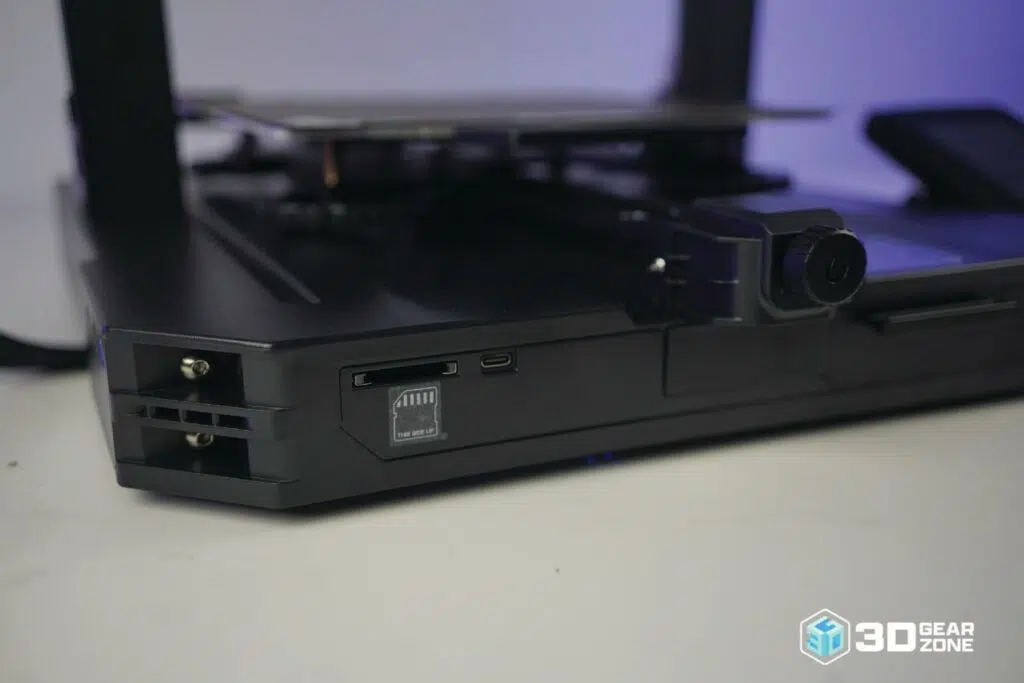
- ▪Data Transmission: Type-C USB / SD card
- ▪3D File Format: STL / OBJ / G-code
Print Performance and Quality
Print performance on the Creality Ender-3 S1 Pro is excellent for an FDM machine in its class. From the get-go, it produces detailed prints with good accuracy and shows few common FDM issues, such as z-banding or warping on standard materials.
However, do be informed that achieving ideal results still requires some hands-on work. For example, while the CR-Touch auto-leveling system handles most of the bed leveling, fine-tuning the Z-offset by hand is essential for ideal first-layer adhesion across the whole bed. Without that adjustment, small adhesion problems can lead to print failures.
Pushing print speeds past 70-80 mm/s can introduce artifacts like ghosting or ringing, so you often have to choose between speed and the best-looking finish. Despite its strengths, the S1 Pro will invariably show visible layer lines, and getting glass-smooth surfaces usually involves post-processing. You might also experience periodic nozzle clogs, especially with exotic or low-quality filaments.
Test Prints and Benchmark Results
The table below highlights the Ender-3 S1 Pro's performance during tests, showing its strengths in fine-detail reproduction and consistent reliability:
| Test Type | Result Highlights | Observations |
|---|---|---|
| Benchy | Good accuracy for measurements; features are clear; minimal stray plastic. | Overall print quality is superb. Minor flaws can be fixed by adjusting settings. |
| Temperature Tower / Stringing Test | Optimal hotend temperature was found to have less stringing and oozing. | Different brands or even plastic colors need different settings, so you might have to adjust if you switch. |
| Retraction Test | Very little stringing and no blobs; precise control of plastic when moving. | Finding the perfect settings for pulling back the plastic often takes several tries and adjustments. |
| Dimensional Accuracy Test | Very accurate for outside measurements; holes and pegs fit well. | Printed objects are very close to their size in the digital design. This indicates good calibration of the X, Y, and Z directions, important for parts that need to fit together. |
| Overhang/Bridge Test | Very little sagging or bending on parts that stick out or bridge gaps. | The printer does a good job printing angled parts without them drooping much. Bridges stay straight and don't fall apart, showing good cooling and bridging ability. |
| Tolerance Test | Finds the smallest gap needed for parts to fit; smooth interlocking. | Getting parts to fit precisely depends greatly on how you've set up plastic flow, first layer height, and temperature. |
| First Layer Adhesion Test | Smooth, even the first layer strongly sticks to the print bed without lifting. | Large flat prints, especially with certain plastics like ABS, can easily bend or lift off the print bed if the temperature or stickiness isn't just right. |
| Vibration/Ghosting Test | Very little "ghosting" or faint repeating patterns around sharp corners. | Checks for tiny flaws caused by vibrations in the printer's frame or moving parts, especially noticeable after quick turns. |
Firmware, Tuning, and Calibration
Creality equips the Ender-3 S1 Pro with Marlin firmware that runs as its OS, and with CR-Touch, the machine handles bed leveling automatically. Additionally, Creality releases updates regularly to add features, boost stability, or support new accessories.
The community drives the development of alternative firmware options for the S1 Pro. Mriscoc's professional Marlin builds offer a polished Marlin experience. Klipper, meanwhile, operates on an external host such as a Raspberry Pi and unlocks higher performance with input shaping and pressure advance.
Possible Upgrades for the Creality Ender-3 S1 Pro
Upgrading the Creality Ender-3 S1 Pro can improve its performance, reliability, and functionality, tailoring the printer to specific printing needs or desired quality levels.
Here are some possible upgrades for the Creality Ender-3 S1 Pro:
- ▪Enclosure: Adding an enclosure helps maintain a stable internal temperature, which is especially beneficial for printing temperature-sensitive filaments like ABS and ASA.
- ▪Solid Bed Mounts: Replacing the bed springs with solid mounts can provide a more stable print surface and reduce the need for frequent bed leveling adjustments.
- ▪Nozzle Upgrades: Switching to hardened steel, obsidian, or high-flow nozzles can improve durability for abrasive filaments or allow for faster extrusion.
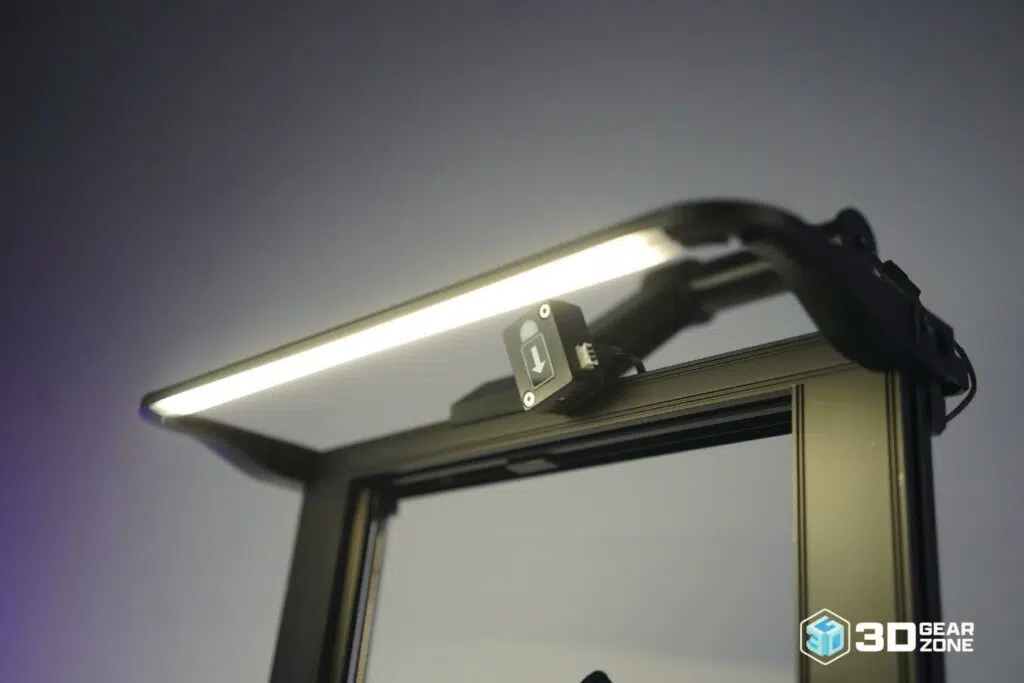
- ▪LED Lighting Kit: Integrating an LED light bar illuminates the print area, making it easier to monitor print progress and identify issues.
- ▪Camera for Remote Monitoring: Installing a small camera allows for remote observation of prints via a smartphone or computer, offering peace of mind and the ability to detect failures early.
- ▪Input Shaper/Accelerometer: Adding an accelerometer and implementing input shaping (often with Klipper) can significantly reduce ghosting and ringing artifacts at higher print speeds.
- ▪Dry Box/Filament Dryer: Using a filament dry box keeps moisture-sensitive filaments dry during printing, improving print quality and preventing issues like stringing or bubbling.
Maintenance, Upkeep, and Reliability
Keeping the Ender-3 S1 Pro in good shape is surprisingly uncomplicated. Just clean the PEI build plate, wipe down the gantry rails, and ensure no filament bits are stuck in the extruder gears. Every so often, tighten the nuts on the rollers and give the Z-axis screws lube as well.
The S1 Pro usually runs smoothly, but the hotend fan might become noisy after some use, so an upgrade would be wise. Besides that, the Bowden tube inside the direct drive can also wear out and cause clogs. When that happens, replace the worn tube with a new, high-temperature-rated version.

Common Issues with the Creality Ender-3 S1 Pro
Even a capable 3D printer like the Creality Ender-3 S1 Pro can have specific issues that users commonly face. Understanding these potential challenges can help troubleshoot and maintain consistent print quality. Here are five common issues with the Creality Ender-3 S1 Pro:
Bed Adhesion Problems
Even with CR Touch and a PEI spring steel build plate, getting the first layer to stick on the S1 Pro can still be tricky. The CR Touch maps out bed height but can't set the exact nozzle-to-bed distance, so you must tune the Z offset in 0.01 mm steps until the filament lays down perfectly.
Regularly clean the PEI sheet with alcohol to remove oils or residue that prevent adhesion. On top of that, it's important to know that temperature swings or drafts in your room can also cause adhesion problems, especially with ABS.
Under-Extrusion
Under-extrusion on the S1 Pro usually comes down to three factors. First, check the Sprite extruder's tension: if the spring loosens over time, the filament gear can slip without you even noticing. Second, examine the PTFE liner in the hotend; if it's frayed, heat creep will soften the filament too early and cause blockages before the nozzle.
Finally, look at your slicer's flow rate. Running below 100 percent means you're underfeeding filament. Bump that setting up to 105 percent when using dense PLA spools with thick cores, and you should be all set.
Z Axis Wobble / Printing Inconsistency
Dual Z lead screws give the S1 Pro a strong foundation, but slight banding can still creep into prints if things aren't perfectly aligned. With the printer off, slide the X gantry to the center and measure from each lead screw nut down to the gantry base. If one side sits higher, loosen its coupler, rotate the motor shaft until it matches, then retighten the set screws.
Over time, the nuts that hold the X-gantry rollers against the rails can loosen or wear, leading to wobble. Check and adjust these nuts so they're snug without being overtight. Then, every 50 hours of printing, apply a thin coat of PTFE grease to both lead screws to reduce friction and prevent small Z-axis stalls.
Firmware Glitches or Bugs
Updating your S1 Pro's firmware can bring new accessory support, but fresh builds sometimes have unexpected quirks. You might find the touchscreen freezing mid-calibration or CR Touch readings that claim the bed is level when it clearly is not. Plus, thermal runaway warnings that trigger without a real problem also happen.
Fortunately, these issues can easily be fixed. After flashing a new firmware version, back up your EEPROM settings through the UI and do a factory reset to clear out old values. If you still experience odd behavior (inaccurate leveling, frozen menus, or false thermal alerts), roll back to the previous stable build, such as version 1.0.4.17, via microSD.
Nozzle Clogs
Clogs on the S1 Pro can strike when you least expect them, especially if you run PETG, TPU, or composite filaments with wood or glow particles. A clicking extruder or sudden under-extrusion is your cue to act.
Heat the hotend to 240 °C (464°F) and unload any filament. Afterward, perform a cold pull by heating to 100 °C (212°F), feeding cleaning filament or nylon until it oozes, letting it cool to 90 °C (194°F), and pulling it out to remove debris. If that doesn't clear the blockage, heat to 260 °C (500°F), remove the 0.4 mm brass nozzle, and soak it in acetone (for PLA) or use an ultrasonic cleaner. For a long-term solution, swap to an all-metal nozzle rated for 300 °C (572°F) to handle materials without wearing out as quickly.
Comparisons with Alternative Models
Below is a side-by-side breakdown of how the Creality Ender-3 S1 Pro stacks up against other popular FDM 3D printers in its class:
| Ender-3 S1 Pro | Elegoo Neptune 4 Pro | Bambu Lab A1 | Ender-3 V3 SE | Anycubic Kobra 2 | |
|---|---|---|---|---|---|
| Build Volume | 220 x 220 x 270 mm | 225 x 225 x 265 mm | 256 x 256 x 256 mm | 220 x 220 x 250 mm | 220 x 220 x 250 mm |
| Print Speed | Up to 150 mm/s | Up to 500 mm/s (standard 250 mm/s) | Up to 500 mm/s | Up to 250 mm/s (avg 180 mm/s) | Up to 300 mm/s |
| Assembly Complexity | Easy | Easy | Very Easy | Easy | Easy |
| Price Range | $279 – $500 | $219 – $270 | $375 – $400 | $199 – $220 | Around $170 |
| Customization Options | Good, large community for mods | Good, Klipper firmware allows advanced tuning | Good, but less open-source; multi-color with AMS Lite | Good, large community for mods | Generally good, but community support for mods may be less extensive than Ender series |
Our Final Take
The Creality Ender-3 S1 Pro is a fundamentally good and reliable 3D printer. It offers a stable build, a capable direct drive system, and features like automatic bed leveling that significantly improve the user experience compared to its predecessors. However, to open its full potential and bring it closer to the performance levels of more modern 3D printers, it must be fitted with upgrades and community-driven firmware enhancements.
In 2025, the consumer 3D printing market has reached new heights. We're now seeing a wave of new machines with significantly faster print speeds, more sophisticated automation, and advanced, intuitive user interfaces that can practically print with very little input from you.
Because of this, recommending the Ender-3 S1 Pro at its initial retail price tag now feels like suggesting a Nokia 3310 in a world full of iPhones. Its capabilities, once cutting-edge, are now standard, and many newer models offer a far more advanced printing experience for the same, or even less, amount of money.

Scott Gabdullin is a Canadian entrepreneur, investor, and marketing expert who has successfully combined his passion for technology and innovation with a love for adventure and exploration.
Scott brings 12 years of digital marketing experience and a hardcore work ethic to his new passion for 3D printing. If he is not working on this business, he is likely travelling and Overlanding across North America with his wife and 2-year-old son in their Jeep Rubicon.
Read more →