Formlabs Form 3 Review
The Form 3 brings serious capability to desktop SLA printing. Built to turn digital designs into sharp, high-detail prints, it delivers smooth surfaces and reliable results without much fuss, a machine that handles demanding jobs without stepping into industrial territory.

Score breakdown
Industrial detail, desktop footprint
The Form 3 brings serious capability to desktop SLA printing. It turns digital designs into sharp, high-detail prints with smooth surfaces and reliable results, handling demanding jobs without stepping into industrial territory. This review looks at what it's like to use day to day, from print quality and workflow to overall value.
An Overview of the Formlabs Brand
Formlabs was founded by a group of MIT Media Lab students who wanted to make high-quality 3D printing more accessible back in 2011. Their first big release was the Form 1, an SLA printer that made a once-expensive, industrial-only process available to smaller teams, studios, and individual creators. Since then, Formlabs has become a major player, offering a full range of SLA and SLS machines and a wide selection of materials for different jobs.
Unboxing and Building the Form 3
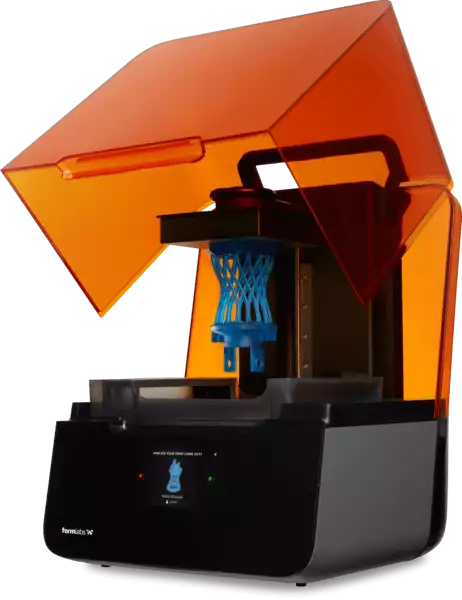
Unboxing the Form 3 feels more like setting up a well-designed appliance than a piece of workshop gear. Everything is packaged neatly, labeled clearly, and built to get you printing with little effort. The box holds the printer, resin tank, build platform, and a finishing kit.
Setting It Up
Setup is refreshingly simple, with most of the heavy lifting already done out of the box. You unlock the Light Processing Unit (LPU) from its shipping position, connect power and network, run through the touchscreen onboarding, then drop in the resin tank, mixer, build platform, and resin cartridges. Here's how the stages break down.
| Stage | Time Estimate | Key Challenges | Tips / Notes |
|---|---|---|---|
| Unboxing & Placement | 15-30 min | Handling the printer's size and weight | Set up a clean, flat, ventilated workspace away from sunlight and drafts. |
| Unlocking the LPU | 2-5 min | Removing shipping screws and latch | Check the manual for latch and screw locations; keep the parts. |
| Connecting Power & Network | 5-10 min | Ensuring a stable connection | Use Ethernet or Wi-Fi for reliable PreForm and Dashboard access. |
| Resin Tank, Mixer & Platform | 5-12 min | Correct orientation and secure fit | Align each part with its rails and push until it clicks; sensors confirm. |
| Inserting Resin Cartridges | 2-5 min each | Vent cap open, proper orientation | Shake each cartridge, insert flush, and open the vent cap. |
| PreForm & Print Prep | 15-30 min | Learning PreForm; orientation, supports | PreForm suggests the best orientation and supports; you can adjust them. |
Our Initial Impressions on Build Quality
The Form 3 makes a strong first impression with its clean design and construction. The fit and finish are excellent, giving it a professional presence that feels purpose-built for serious work. Nothing feels flimsy or overlooked: the touchscreen is responsive, the resin tank and build platform snap in smoothly, and the overall assembly has a reassuring weight.
Design and Technical Specifications
The Form 3's design is clean, practical, and built to handle regular use: good on a desk, solid enough for a workshop, with easy access to every part. Rather than cramming in flashy features, Formlabs focused on what improves print results. The flexible resin tank, custom Low Force Stereolithography light unit, and steady motion system work together to produce smoother prints with fewer hiccups.
Key Technical Specifications
- ▪Print Tech: Low Force Stereolithography (LFS)
- ▪Build Volume: 145 x 145 x 185mm
- ▪Layer Thickness: 25-300 microns
- ▪Resin Fill: Automated
- ▪Supports: Auto-generated
- ▪Display: 5.5″ 1280×720 touchscreen
- ▪Connectivity: Wi-Fi, Ethernet, USB 2.0
- ▪Operating Temp: Auto-heats to 35°C
- ▪Weight: 17.5kg
- ▪Software: PreForm (Windows, Mac)
- ▪File Types: STL, OBJ
- ▪Warranty: One-year manufacturer
Print Performance and Quality
The Form 3 handles complex designs beautifully, capturing fine details that make a real difference in prototypes and final parts. While it's not the fastest machine, print quality stays surprisingly consistent across different resins, with smooth surfaces and sharp features that require little cleanup.
Test Prints and Benchmark Results
| Test Type | Result Highlights | Observations |
|---|---|---|
| Dental Calibration Part | Exceptional accuracy on fine anatomical detail | Sharp margins, clear gum lines, smooth surfaces with no visible layer lines. |
| Exposure Test | Clear differentiation between settings | Well-cured features at optimal settings, neither brittle nor swollen. |
| Thin Wall Test | Uniform thickness down to ~0.2 mm | Walls solid with no gaps, firm without being brittle. |
| Hole / Pin Test | Reproduced to ~0.15-0.2 mm | Holes clean and round; pins sharp, straight, and well-fitting. |
| Overhang / Bridge | Minimal sag when supported | Smooth undersides, little stair-stepping, firm bridges. |
| Support Removal & Finish | Supports detach cleanly | Small touchpoints leave easily sandable nubs or a pristine surface. |
Firmware, Tuning, and Calibration
The Form 3 relies heavily on its built-in firmware to run smoothly. Formlabs regularly pushes updates through the printer or PreForm, and calibration and tuning are done automatically: the sensors and resin system keep things consistent without much user input. That makes it easy and dependable, though it limits customization, you can't tweak settings beyond what Formlabs allows.
Upgrades, Maintenance, and Common Issues
The Form 3 performs well on its own, but a few add-ons round out the workflow, mostly speeding up post-processing and resin handling: the Form Wash and Form Cure stations, spare build platforms, the Resin Tank V2.1, a resin pump, and Fleet Control for managing multiple printers. Maintenance mostly comes down to cleaning the resin tank and LPU window regularly. The issues to watch for:
- ▪Print failures — parts not adhering to the build platform, leading to failed or detached prints.
- ▪Resin tank leaks or damage — leaks, clouding, or scratches on the flexible film affecting quality.
- ▪Resin dispense errors — cartridges failing to dispense, usually a blocked vent cap or faulty valve.
- ▪LPU contamination — dust or resin on the optical window, or grinding noises from the unit.
- ▪Connectivity problems — trouble connecting to Wi-Fi/Ethernet or being recognized by PreForm.
Comparisons with Alternative Models
The Form 3 is one of many desktop SLA printers, each with its own trade-offs. Here's how it stacks up against the field.
| Formlabs Form 3 | Anycubic Photon Ultra | Peopoly Moai 200 | Asiga Max 2 | |
|---|---|---|---|---|
| Build Volume | 145 × 145 × 185 mm | 102 × 58 × 165 mm | 200 × 125 × 200 mm | 119 × 67 × 75 mm |
| Technology | SLA (LFS) | DLP | Laser SLA | DLP |
| Assembly | Mostly assembled | Mostly assembled | Moderate | Fully assembled |
| Price Range | $2,000 – $2,500 | $400 – $600 | $1,500 – $2,500 | $9,000 – $15,000 |
Cheaper MSLA machines from Anycubic and ELEGOO undercut it dramatically on price, while industrial DLP rigs like the Asiga sit far above it. The Form 3 occupies the sweet spot of professional reliability and automated workflow without industrial cost.
Our Final Take
The Form 3 is still a great printer that delivers reliable, high-quality prints despite its age. It's a strong choice if you need detailed parts, appreciate a simple UI, and can absorb the cost. Take note, though, that it's now an outdated model: Formlabs has released the Form 4, which offers faster speeds, improved accuracy, and better overall performance. If you don't need the latest, the Form 3 remains a dependable professional workhorse.

Scott Gabdullin is a Canadian entrepreneur, investor, and marketing expert who has successfully combined his passion for technology and innovation with a love for adventure and exploration.
Scott brings 12 years of digital marketing experience and a hardcore work ethic to his new passion for 3D printing. If he is not working on this business, he is likely travelling and Overlanding across North America with his wife and 2-year-old son in their Jeep Rubicon.
Read more →