ELEGOO Saturn 2 Review
ELEGOO set out to close the gap between printing large and printing highly detailed. The Saturn 2 pairs a powerful 10-inch 8K monochrome LCD with a patented Fresnel collimating light source, resetting expectations for the mid-range and forcing the rest of the industry to step up.

Score breakdown
The printer that reset the mid-range
ELEGOO's Saturn 2 delivers a smoother, more user-friendly experience from start to finish. What really stands out is its reliability: it gets most jobs done with output quality that used to cost far more. Supports, sharp edges, and extended overhangs often come out clean, with zero sagging or warping.
Naturally, there are downsides. While it aims for easy use, ChiTuBox can feel clunky if you're used to more advanced tools. And because the machine isn't fully enclosed, you may notice more fumes in smaller rooms even with the air filter attached.
An Overview of the ELEGOO Brand
Founded in 2015, ELEGOO quickly made a name for itself by offering reliable resin (MSLA) and FDM printers at accessible prices. The company actually started with STEM kits, but soon earned a strong reputation for beginner-friendly machines and an engaged user community.
ELEGOO's breakthrough came with the Mars series, which brought resin printing to a wider audience. That success led to the larger, more advanced Saturn line. The Saturn 2 answered the call for a large-format resin printer that could produce detailed models without a steep price, and that momentum carried into the Saturn 3 and Saturn 4 Ultra.
Unboxing and Building the ELEGOO Saturn 2
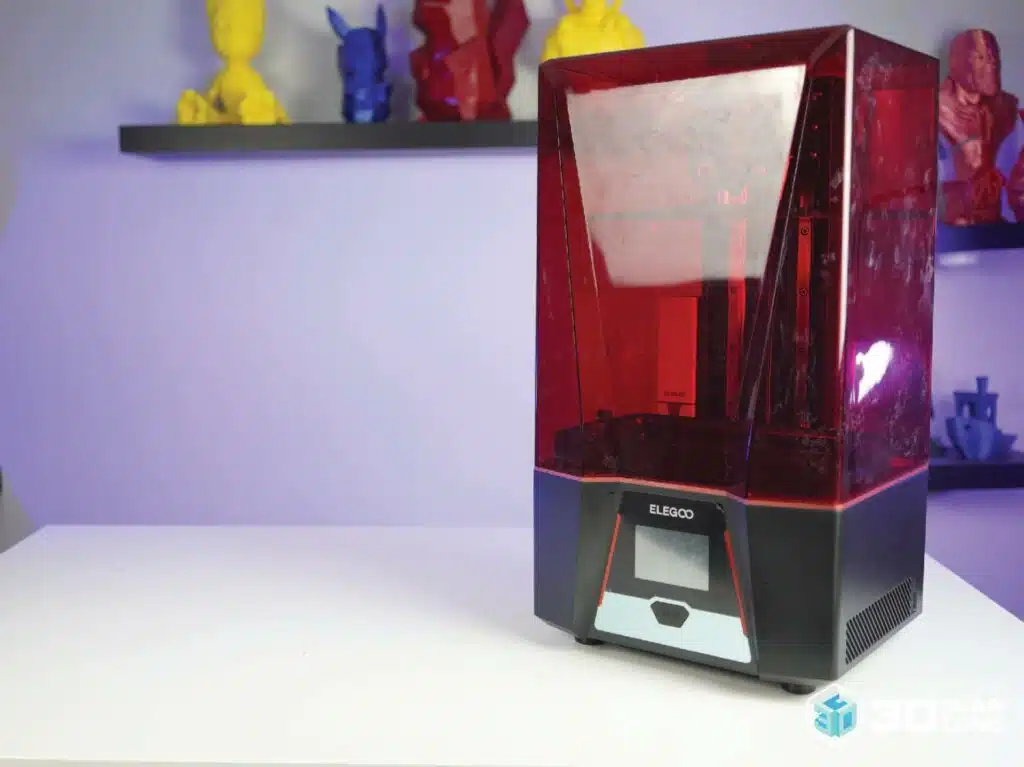
Unboxing the Saturn 2 is straightforward and satisfying. It comes well-protected in a sturdy box with custom-cut foam. Lift off the top foam and you'll find the printer fully assembled, complete with its signature red UV cover. A separate compartment holds every tool and peripheral you need. Our one minor complaint: the Saturn 2 is large and heavy, so unboxing solo can be a workout.
What's in the Box?
- ▪Main printer unit
- ▪USB air purifier
- ▪Build plate
- ▪Funnel
- ▪USB drive
- ▪Scraper
- ▪Mask and gloves
- ▪Backup screws
- ▪Power adapter
- ▪User manual and tool kit
Building the Machine
Because the Saturn 2 arrives pre-assembled, setup is mostly unpacking, leveling, and loading resin. Here's how the process breaks down.
| Stage | Time Estimate | Key Challenges | Tips / Notes |
|---|---|---|---|
| Unboxing & Initial Assembly | 10-15 min | Handling the heavy main unit | Get help lifting it; set the vat and plate aside until you're ready to install them. |
| Removing Shipping Protection | 5-10 min | Locating all foam blocks and tape | Peel back all corners of the vat and plate; gently shake the chassis to dislodge trapped bits. |
| Connecting Power & USB | 2-3 min | Ensuring secure cable connections | Use the included power brick; format drives to FAT32 before copying .ctb files. |
| Power-On & Onboarding | 3-5 min | Navigating the touchscreen UI | Check your firmware number and update from USB if the screen skips or freezes. |
| Attaching & Leveling Plate | 10-15 min | Parallelism between plate and LCD | Lay a full sheet of paper on the screen; lower the plate until it grips evenly at all corners. |
| Loading Resin | 5 min | Avoiding spills and overfilling | Wear gloves; pour slowly to the marked line and keep paper towels handy. |
| Slicer & Print Prep | 10-20 min | Setting exposures, supports, raft | Use ChiTuBox's Saturn 2 profile; 0.05 mm layers, 4× anti-aliasing, snug supports. |
Our Initial Impressions on Build Quality
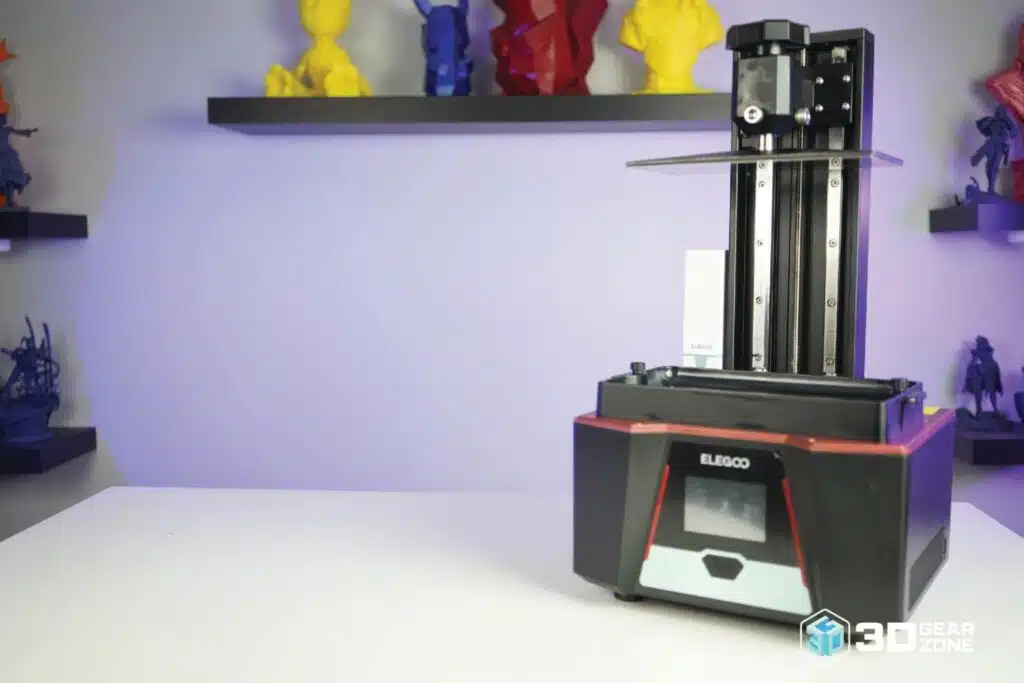
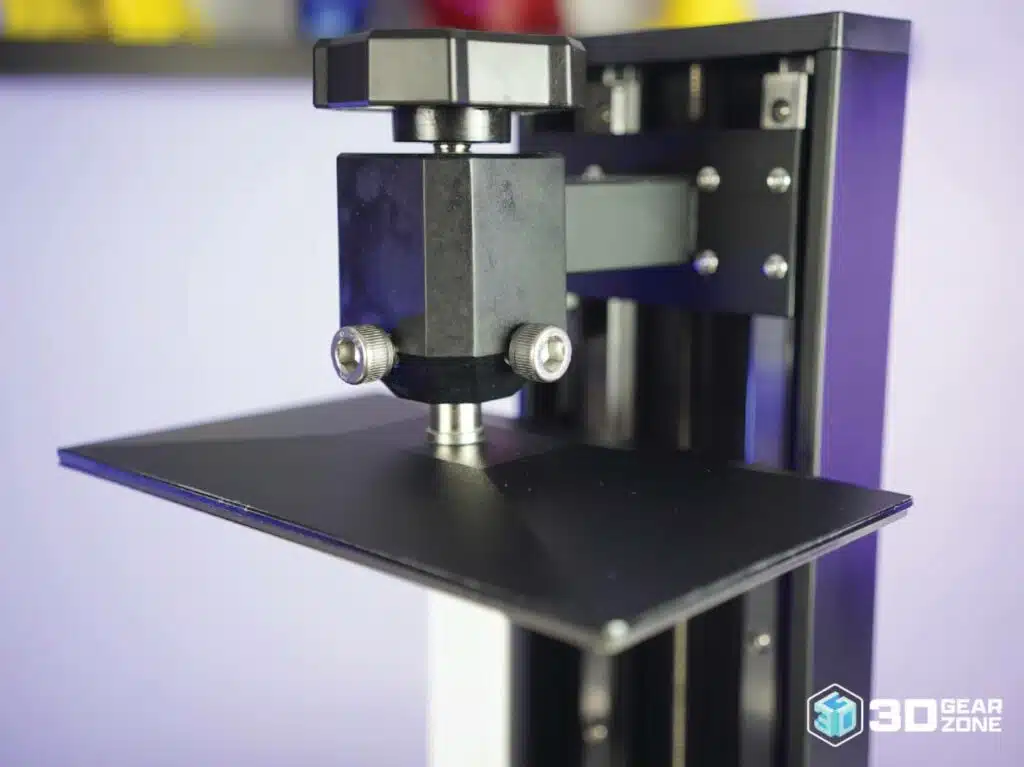
The Saturn 2 has a solid, well-built frame that feels sturdy right out of the box. The Z-axis linear rails are a big reason for this, helping the printer move without wobble, which shows up in the final prints when you want fine details. Prints attach firmly to the sandblasted aluminum build plate, and the tempered-glass screen protector defends against spills and scratches. It also runs quietly, humming in the background without distracting noise.
That said, the strong bed adhesion can make print removal tricky, and thin or delicate parts may chip if you're not careful. Leveling takes some patience thanks to a two-screw system that can be finicky. The built-in purifier reduces odors, but you'll still want good ventilation. With that in place, the sizable build volume and consistent output make it dependable.
Design and Technical Specifications
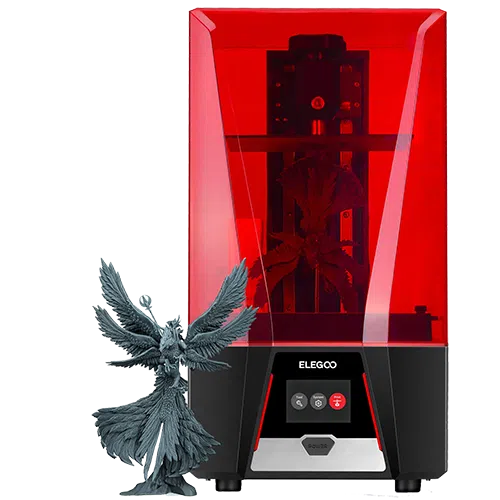
The Saturn 2 hits the sweet spot between top-tier features and an affordable price. That 8K screen means prints come out smooth, with layer lines you'll only see if you squint, and the 219 × 123 × 250 mm build area handles tall models or multiple small ones in one go.
The design looks sharp without feeling intimidating. The red UV cover adds color, the front-facing power button and touchscreen make it easy to operate, and a glass guard protects the LCD. Inside, dual Z-axis rails keep everything rock steady, and the Fresnel optics spread UV light evenly for consistent curing across the whole plate.
Key Technical Specifications
- ▪LCD: 10″ 8K mono (7680 x 4320)
- ▪XY Resolution: 0.0285mm (28.5 µm)
- ▪Build Volume: 218.88 x 123.12 x 250mm
- ▪Printing Tech: MSLA photocuring
- ▪Light Source: Fresnel COB, 405nm
- ▪Printing Speed: 30-70mm/h
- ▪Layer Thickness: 0.01-0.2mm
- ▪Z-Axis Accuracy: 0.00125mm
- ▪Operation: 3.5″ touch screen
- ▪Slicer: ChiTuBox (EL3D-3.0.1)
- ▪Connectivity: USB
- ▪Net Weight: 11kg
- ▪Printer Size: 305.9 x 273 x 567.3mm
- ▪Power: 100-240V, 50/60Hz
Print Performance and Quality
Once you dial in the right settings, the Saturn 2 delivers outstanding print quality. Out of the box, results are already sharp, but slight adjustments take things further: slowing lift speeds and tuning exposure gives cleaner surfaces and fewer failed prints. After basic tuning, it consistently produces clean, detailed results across the entire build plate.
Test prints with fine grooves or layered textures come out crisp, and it handles overhangs and tight internal features better than many machines in its price range. People who've spent time with the Saturn 2 often say they don't want to go back to their older printers.
Test Prints and Benchmark Results
| Test Type | Result Highlights | Observations |
|---|---|---|
| Fine-Feature Test | Tiny spires and thin wires come out sharp, no merging | Handles fine lines down to 0.2 mm; if edges look fuzzy, cut exposure by 1-2s. |
| Exposure Tower | Precise calibration; good detail-vs-integrity balance | Start with manufacturer settings, then tweak in 0.5s steps until layers peel cleanly. |
| Dimensional Cube | Within 0.1 mm of target; holes and slots fit snugly | Check XY scale in ChiTuBox; adjust if you see consistent oversizing. |
| Overhang & Bridge | Angles to 30° hold; bridges span 10 mm without droop | Slow lift and peel speeds to reduce stress on fresh layers. |
| First-Layer Adhesion | Thick base layers stick solidly; no lifting at corners | Wipe the plate with isopropanol; use 5-6 base layers on a textured plate. |
| Ghosting & Ringing | Flat surfaces stay smooth; no ghost lines at corners | If you spot rings, tighten the Z-axis lead screw and slow print speed by 10%. |
Firmware, Tuning, and Calibration
ELEGOO ships stable firmware and occasionally rolls out updates that fix bugs or improve touchscreen response. Updating is simple: download the correct file to the included USB stick and run it like a print. The Saturn 2 works best when you use ChiTuBox to dial in resin settings.
ELEGOO provides defaults for its own resins, but you'll still need to adjust based on brand, color, and type. Room temperature matters too: cool resin thickens, requiring longer exposure or slower movement. For the best first layer, make sure the Z-axis is perfectly leveled, and run exposure tests like the RERF or a matrix print to dial things in.
Possible Upgrades for the ELEGOO Saturn 2
The Saturn 2 is an excellent platform for high-quality resin printing, with plenty of room for personalization. The upgrades we found most worthwhile:
- ▪Flexible magnetic build-plate system
- ▪Heated resin vat or enclosure heating
- ▪Enhanced air filtration and ventilation
- ▪ACF release film in place of stock FEP
- ▪External USB filters like the Mars Mate
- ▪Vented enclosure for shared spaces
Maintenance and Common Issues
Like any resin printer, the Saturn 2 needs regular care. After every print, clean the vat and check the FEP film for cured resin; use a plastic scraper gently and filter floating bits through a mesh before storing resin. Wipe the build plate with isopropyl alcohol after each job, and keep the LCD free of spills. The common issues and their fixes:
- ▪Prints not sticking to the plate — re-level, increase bottom exposure, or warm up the resin and room.
- ▪Prints sticking to the FEP film — reduce normal exposure, lower lift speed, or replace worn film.
- ▪Warping or deformation — add stronger supports, post-cure fully, or slow lift speeds.
- ▪Layer lines or artifacts — recalibrate exposure, optimize lift/retract speeds, or clear Z-axis debris.

Comparisons with Alternative Models
The Saturn 2 set a high bar for accessible large-format resin printing. Here's how it compares with prominent rivals and its own successor.
| ELEGOO Saturn 2 | Anycubic Photon Mono X | Creality Halot-Mage | ELEGOO Saturn 3 | |
|---|---|---|---|---|
| Build Volume | 219 × 123 × 250 mm | 192 × 120 × 245 mm | 228 × 128 × 230 mm | 219 × 123 × 250 mm |
| Print Speed | 30-70 mm/h | 40-80 mm/h | 70-170 mm/h | Up to 150 mm/h |
| Resolution | 8K (28.5 µm) | 4K (50 µm) | 8K (29.7 µm) | 12K (19 µm) |
| Price Range | $200 – $450 | $250 – $400 | $350 – $500 | $299 – $399 |
The Anycubic Photon Mono X is cheaper but only 4K. The Creality Halot-Mage prints faster with similar 8K detail, and the Saturn 3 steps up to 12K. Even so, the Saturn 2's blend of 8K resolution, large volume, and rock-bottom street price keeps it relevant.
Our Final Take
Even with the Saturn 3 available, the Saturn 2 proves that good design, steady performance, and a fair price go a long way. With street prices hovering around $200 (or less during sales), it offers serious value. Setup is simple, the touchscreen is user-friendly, and print quality is impressive right out of the box. Thanks to its large build volume and 8K resolution, it's perfect for big models or highly detailed miniatures.

Scott Gabdullin is a Canadian entrepreneur, investor, and marketing expert who has successfully combined his passion for technology and innovation with a love for adventure and exploration.
Scott brings 12 years of digital marketing experience and a hardcore work ethic to his new passion for 3D printing. If he is not working on this business, he is likely travelling and Overlanding across North America with his wife and 2-year-old son in their Jeep Rubicon.
Read more →