EPAX X1 Review
When the EPAX X1 launched, it was positioned as a reliable entry into resin printing. Known for its sturdy build, consistent performance, and straightforward setup, it quickly earned attention from hobbyists and professionals alike, as the rare budget machine that needed less tinkering.

Score breakdown
The polished workhorse of budget resin
The EPAX X1 originally launched in 2019, when resin printing was just starting to become accessible. It quickly gained popularity for build quality and dependable prints, and users valued that it required less tinkering than competitors, making it a workhorse that could run consistently without constant adjustment. Forums and reviews showcased everything from detailed miniatures to engineering prototypes.
Even in 2025, many owners still run their X1 units, a testament to its durability. At first glance it looked like a poor deal, sharing hardware with the Anycubic Photon S and Elegoo Mars Pro for $100 more. But arriving factory-leveled with brand-agnostic part compatibility, included resin profiles, and Western-based support set it apart and made it one of the most beginner-friendly resin printers we've reviewed.
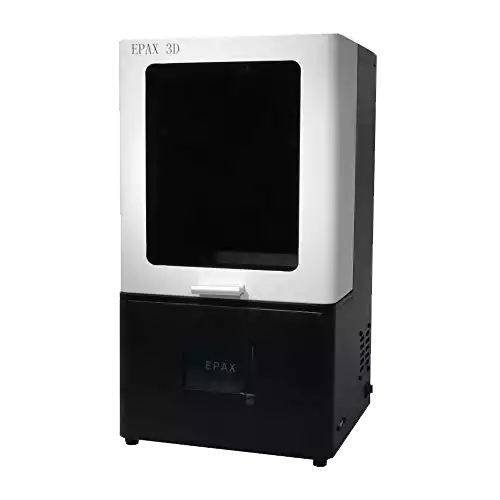
Unboxing and Setup
Unboxing the X1 feels reassuring from the start. The printer comes well-protected with dense foam, and because it arrives fully assembled, you won't sort through piles of loose components. Remove the protective films, secure the build plate, and run the simple leveling procedure with the provided guide. The touchscreen walks you through each step, and within 15 to 20 minutes you can pour resin, load a test file, and start printing.
What's in the Box?
- ▪EPAX X1 printer (preassembled)
- ▪Resin vat with FEP film
- ▪Build plate
- ▪Power supply and cable
- ▪USB stick with test files
- ▪Toolkit: Allen keys, scrapers, gloves, funnels
- ▪Quick start guide
| Stage | Time Estimate | Key Challenges | Tips / Notes |
|---|---|---|---|
| Unboxing & Placement | 10-15 min | Handling the compact but weighty frame | Place it on a level, stable desk with good ventilation. |
| Removing Packaging | 5 min | Peeling films without scratching parts | Keep the original packaging for future transport. |
| Build Plate Check | 5 min | Ensuring it's firmly in place | Lightly tighten and confirm plate alignment. |
| Resin Vat Check | 5 min | Vat sitting flush on the LCD | Confirm screws are snug to prevent leaks. |
| Leveling Verification | 5-10 min | Adjusting Z offset if necessary | Follow prompts; usually factory-leveled. |
| First Test Print | 10 min + print | Pouring resin safely | Wear gloves, mix resin well, use the USB test file. |
Design and Technical Specifications
For its time, the X1's specs were impressive. In 2025, most new resin printers feature 4K-8K LCDs, larger build volumes, and faster monochrome screens, so the X1 can feel dated. Yet it still produces clean, dependable detail that works well for miniatures, jewelry prototypes, dental models, and small functional parts. You won't get ultra-crisp definition or speed, but its consistency and reliability remain appealing for users who value tried-and-true performance.
Specs at a Glance
- ▪Build Volume: 115 x 65 x 155mm
- ▪XY Resolution: 47 µm (2K LCD)
- ▪Layer Thickness: 0.01-0.1mm
- ▪Z-Axis: Dual linear rails, anti-backlash
- ▪Light Source: UV LED matrix, 405nm
- ▪Interface: 3.5″ color touchscreen
- ▪Connectivity: USB
- ▪Frame: Solid metal, compact footprint
Print Performance and Quality
The X1 has always been known for consistent, reliable prints. Layer adhesion is strong, details are sharp, and surface finishes are smooth compared to many 2019-era peers, with miniature makers praising parts that needed minimal cleanup. In 2025 its quality still holds up, though it lags behind the ultra-sharp definition of 8K printers and the speed of modern monochrome LCDs. Long print times are common, but the trade-off is reliability: the X1 rarely misbehaves once tuned.
Test Print and Benchmark Results
| Test Type | Result Highlights | Observations |
|---|---|---|
| Dimensional Accuracy | Close to CAD specs | Slight deviations possible on large diagonals, but minimal. |
| Fine Detail Test | Crisp miniature details | Edges and textures stay clear even at small scales. |
| Overhang / Support | Clean with proper supports | Supports detach cleanly; slight marks sand off easily. |
| Tall Model Stability | No wobble detected | Dual rails keep the Z-axis steady on multi-hour prints. |
| Surface Finish | Smooth resin surfaces | Requires minimal sanding or post-processing. |
Possible Upgrades for the X1
Keeping the X1 current doesn't mean buying a new printer. The community-favorite upgrades that keep it feeling fresh:
- ▪Monochrome LCD swap for faster cures
- ▪NFEP film for smoother release
- ▪Textured or sandblasted build plate
- ▪Quieter fans and better cooling
- ▪Reinforced UV LED array
- ▪Dedicated post-curing station
Maintenance and Common Issues
The X1 is reliable but, like any resin printer, needs consistent care: filter unused resin after each print, wipe the build plate, keep the screen protector clean with IPA, and check the FEP weekly for scratches or clouding. The common issues and their fixes:
- ▪Poor first-layer adhesion — re-level the plate, lightly sand it, and boost bottom-layer exposure.
- ▪Ringing or faint layer bands — tighten and lubricate the Z rails, slow the lift, and add a short rest after each lift.
- ▪Supports scarring or breaking — increase tip size, add supports in heavy areas, and shorten lift distance for small parts.
- ▪Cloudy or punctured film — swap the FEP, or move up to longer-lasting NFEP film.
- ▪Aging LCD or weak curing — soft prints or dead pixels mean it's time to replace the LCD or LED array.
Comparisons with Competitors
The X1 is no longer the newest option, but it stands out for durability and reliable results even against newer machines.
| EPAX X1 | Anycubic Photon Mono 2 | Elegoo Mars 4 Ultra | Phrozen Sonic Mini 8K | |
|---|---|---|---|---|
| Build Volume | 115 × 65 × 155 mm | 165 × 89 × 143 mm | 153 × 78 × 165 mm | 165 × 72 × 180 mm |
| LCD Resolution | 2K | 4K | 6K | 8K |
| Print Speed | Slower | Fast (mono) | Faster (mono) | Faster (mono) |
| Price Range | $250 – $300 | $299 – $399 | $350 – $450 | $500 – $600 |
The X1 is clearly behind on raw specs, but it serves as a budget-friendly entry point, especially as a refurbished unit. If your priority is detail, reliability, and affordability, it still has value; if you want speed, larger build space, and ultra-high resolution, newer models from ELEGOO and Anycubic suit you better.
Our Final Verdict
In 2025, the EPAX X1 is best viewed as a dependable legacy printer. It's not the fastest, flashiest, or most detailed anymore, but it remains reliable for small, detailed prints and consistent day-to-day use. If you already own one, there's little reason to replace it unless you need larger builds or sharper resolution. For anyone who values stability and proven results over the latest features, the X1 still delivers, but if you're chasing cutting-edge performance, newer resin printers are the better buy.

Scott Gabdullin is a Canadian entrepreneur, investor, and marketing expert who has successfully combined his passion for technology and innovation with a love for adventure and exploration.
Scott brings 12 years of digital marketing experience and a hardcore work ethic to his new passion for 3D printing. If he is not working on this business, he is likely travelling and Overlanding across North America with his wife and 2-year-old son in their Jeep Rubicon.
Read more →