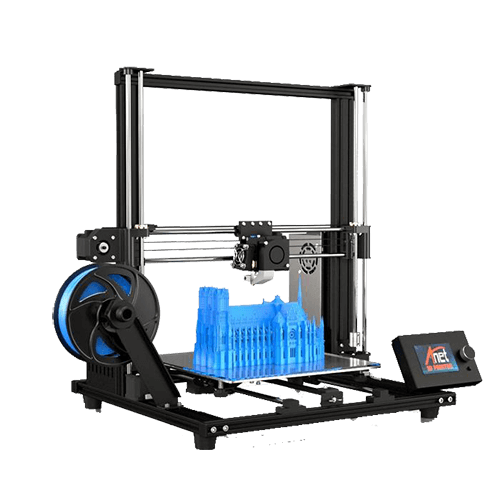
Anet A8 Plus 3D Printer Review
The Anet A8 Plus launched as the stronger and more spacious follow-up to the original Anet A8, which gained popularity for being affordable and highly customizable. As of 2025, it's still around, but the competition has evolved.

Score breakdown
Built to be modified, not unboxed
So how well does the A8 Plus stack up today? That depends on whether you want a ready-to-go printer or enjoy building and modifying it yourself.
The Anet A8 Plus is based on fused deposition modeling (FDM), where plastic filament is melted and extruded through a nozzle to create layers one at a time. While it doesn't match the precision of resin printers for ultra-fine models, it excels in printing strong, functional parts in a wide range of materials. Its large print volume and open architecture allow for more ambitious projects, especially for users who want a hands-on experience and the flexibility to tweak their machine's performance. It's not designed for ease of use, but for flexibility and learning, and in that space, it still holds up.
An Overview of the Anet A8 Successor
Anet released the A8 Plus in late 2018 as an upgrade to their widely adopted Anet A8, a printer that had become a favorite for DIY 3D printing enthusiasts on a tight budget. While the original A8 was lightweight and made from acrylic, the A8 Plus improved on its structure, reliability, and usability without losing the hands-on spirit that defined the series.
Instead of chasing automation, Anet gave users what they had been asking for: a larger build area, a sturdier metal frame, and a printer you could truly make your own. The A8 Plus expanded the build volume to 300 x 300 x 350 mm, upgraded the frame to aluminum extrusion, and added a better heated bed, giving hobbyists room to grow into bigger, more functional projects.
While it may not offer the crisp micro-detail of resin machines, it trades that for versatility. Whether you are printing PETG brackets, TPU gaskets, or PLA prototypes, the A8 Plus gives you the space and freedom to experiment and fix things when they go wrong.
Assembly is a full DIY experience. You get a box of parts, a bag of screws, and a real opportunity to understand how your printer works. In a 2025 market dominated by plug-and-play machines, that approach now feels niche, but for many users, that is what makes it special. It teaches you patience, calibration, and how to build something that you can actually upgrade or repair.
The A8 Plus is also one of the most modded printers ever built. Users add BLTouch for auto bed leveling, silent stepper drivers, all-metal hotends, touchscreen interfaces, OctoPrint, and more. Many people are still using their A8 Plus today, heavily modified, often upgraded with 32-bit boards, but still going strong.
Unboxing and Building
Unboxing the Anet A8 Plus is not the kind of quick-start experience you get with modern prebuilt printers. What you will find instead is a box of parts, labeled bags of screws, acrylic or aluminum pieces (depending on your model version), and a printed instruction manual. It is an experience that feels closer to building a machine than unpacking one.
There is no layered foam or preassembled Z-rail waiting to slide into place. Every rod, bearing, and bracket needs to be attached by hand. For users who like understanding every bolt and wire on their printer, this is a plus. The process is time-consuming, with most users taking five to eight hours to complete the build, but it is also one of the most educational introductions to how 3D printers work.
The Anet A8 Plus requires full mechanical assembly, including attaching the frame, installing motors, running belts, wiring the mainboard, and assembling the extruder. The instructions are serviceable, but many builders find themselves following YouTube tutorials from the Anet community to avoid confusion or missed steps.
Leveling is manual and done using the paper method. You slide a sheet of paper between the nozzle and the bed at each corner, adjusting the screws until you feel light resistance. It is simple but effective, and most users get consistent results once everything is properly tightened.
Test printing requires slicing a model on your own using Cura or PrusaSlicer, saving it to a microSD card, and navigating the A8 Plus's basic LCD interface to run the file. There is no touchscreen, no flashy UI, and no bundled test print with instructions. It puts the responsibility on the user, which can be frustrating at first but gives a deeper sense of control later.
What's in the Box
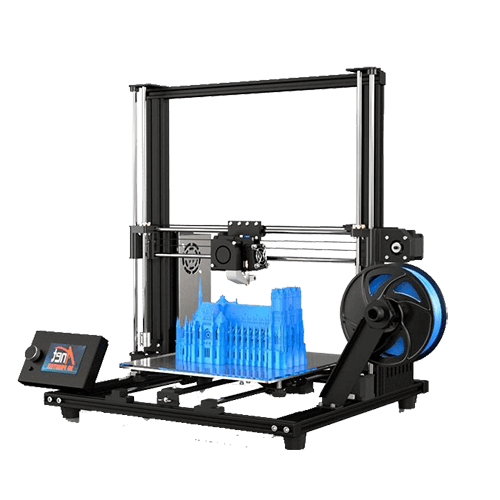
- ▪Anet A8 Plus (disassembled kit)
- ▪Aluminum extrusion frame parts
- ▪Heated aluminum print bed
- ▪Standard MK8-style extruder and hotend
- ▪MicroSD card and USB reader
- ▪Wiring harness and control board
- ▪LCD screen with control knob
- ▪Tools and Allen keys
- ▪Printed manual
Building the A8 Plus
Every part of the Anet A8 Plus must be assembled manually. The Z-rails, X and Y carriages, motors, endstops, belts, and frame components come in separate bags. There is no plug-and-play here. You start with the frame, then gradually add moving parts, wiring, and finally install the firmware.
Unlike machines that walk you through auto-leveling on your first boot, the A8 Plus asks you to know how far your nozzle should be from the bed before your first print. It is a throwback experience, but also what makes the printer so popular among modders.
| Setup Step | Estimated Time | What to Watch For | Helpful Tip |
|---|---|---|---|
| Unboxing and Inventory | 15 to 20 minutes | Missing hardware or bent rods | Lay everything out and count parts first |
| Frame Assembly | 1.5 to 2 hours | Loose joints (causes wobble) | Tighten all corners evenly |
| X and Y Axis Assembly | 1 to 1.5 hours | Belt routing confusion | Follow YouTube guides for routing tips |
| Wiring and Electronics | 1 to 2 hours | Crossed connections | Label ends before plugging in |
| Hotend and Extruder Install | 30 to 45 minutes | Incorrect thermistor placement | Double-check the wiring diagram |
| Manual Bed Leveling | 15 minutes | Bed flex or screw stiffness | Use uniform pressure at each corner |
| Test Print Setup | 20 to 30 minutes | Incorrect slicer profile | Start with basic PLA settings |
Initial Impressions
When powered on for the first time, the Anet A8 Plus does not try to impress with animations or touchscreen controls. The interface is minimal, but it responds as expected. The steppers engage cleanly, the fans spin up without odd noises, and the heated bed reaches temperature in a reasonable time.
You can feel the sturdiness of the aluminum frame once everything is tightened. The printer does not wobble during fast movements, and the Z-rails hold firm when homing or starting a print. Print quality out of the box is decent, and once you spend a few hours tuning your slicer and verifying tension and flow rate, results quickly improve.
Early prints usually require a bit of troubleshooting. You might need to re-level the bed or re-check your extrusion multiplier, but the process teaches you how each part affects the outcome. That hands-on tuning process is exactly why many people end up liking this printer more over time. It becomes a project you understand and trust, not just a black box that prints in the background.
Design and Technical Specifications
The Anet A8 Plus does not look fancy out of the box, but its design shows clear intention. Once fully assembled, the frame feels solid and capable of absorbing printing vibrations without shifting. The aluminum extrusions give it a level of durability the original acrylic-framed A8 lacked, and over longer prints, that sturdiness becomes even more important.
The printer uses a single lead screw on the Z-axis, supported by dual rods on either side. While this is not as advanced as a dual-leadscrew setup, it performs well for prints within the A8 Plus's size range. The print head moves smoothly on V-slot wheels, and with proper tensioning, the motion system runs consistently for hours.
The heated aluminum bed is large and evenly heated, reducing warping with filaments like PLA and PETG. Manual leveling can take a bit of practice, but the bed holds its level well once dialed in. There is no auto bed leveling by default, but the printer is compatible with aftermarket solutions like the BLTouch.
Print resolution is on par with other FDM machines in its class. The A8 Plus can achieve layer heights as low as 0.1 mm, though most users find that a 0.2 mm layer height offers the best balance of speed and quality. With tuning, it can produce sharp corners and reliable overhangs, though bridging may benefit from a part cooling upgrade.
Connectivity is basic. You use a microSD card to transfer files, and the printer interface is controlled by a rotary knob and a basic LCD screen. It is not flashy, but it works reliably without needing Wi-Fi setup or firmware syncing. That simplicity appeals to users who prefer stability over smart features.
Possible Upgrades of Printer Parts
One of the standout strengths of the Anet A8 Plus is its incredible upgrade potential. This is not just a printer; it is a blank canvas. While many machines today are locked into specific hardware ecosystems, the A8 Plus is open, modifiable, and fully customizable. That freedom has earned it a loyal fanbase that continues to keep the printer relevant in 2025.
BLTouch or CR Touch
Auto bed leveling transforms the setup experience and improves first-layer reliability. Manual leveling can be frustrating and inconsistent, especially for beginners. With BLTouch or CR Touch installed, your machine probes the bed automatically before each print and compensates for any slight warping or tilt. This means more reliable adhesion, fewer failed prints, and a much more forgiving setup overall. It is one of the most recommended upgrades for good reason.
Silent Stepper Drivers (TMC2208 or TMC2209)
The original A8 Plus is notoriously loud during operation. Replacing the stock drivers with TMC2208 or TMC2209s reduces the whine and grind of stepper motors to a near whisper. For those printing overnight or in shared living spaces, the difference is huge. It is not just about noise either. These drivers tend to make motion smoother, which can slightly improve print quality too.
All-Metal Hotend
Swapping out the stock PTFE-lined hotend for an all-metal version gives you more flexibility with filament types. Materials like PETG, ABS, and even nylon need higher temperatures than can degrade PTFE over time. An all-metal hotend lets you print at those temperatures safely. It also reduces the risk of heat creep and clogs, which is a big deal if you print for hours at a time.
Direct Drive Conversion
Bowden-style extrusion systems, like the one that comes stock on the A8 Plus, can struggle with soft filaments like TPU. A direct drive upgrade mounts the extruder motor directly above the hotend, shortening the filament path. This makes flexible printing much easier and gives you tighter control over retraction and extrusion. It is a bit more complex to install, but for some users, it opens up entirely new material possibilities.
Touchscreen LCD
The stock control knob and monochrome interface get the job done, but a touchscreen adds speed and clarity. Menu navigation becomes easier, settings are more accessible, and you can see thumbnails of your prints if your firmware supports it. This upgrade is mostly about convenience, but once you have it, going back feels awkward.
OctoPrint or Klipper
Installing a Raspberry Pi with OctoPrint or Klipper transforms how you interact with your printer. With OctoPrint, you can control your printer wirelessly, start prints remotely, monitor progress via webcam, and manage your print files from any browser. Klipper, on the other hand, offloads motion calculations to the Pi, allowing for faster, more precise prints. Both require some setup knowledge but bring serious functionality to the table.
Stronger Power Supply or External MOSFETs
One of the big concerns with early Anet models was fire safety. While the A8 Plus improved power delivery compared to its predecessor, upgrading to a more reliable power supply adds peace of mind. External MOSFETs for the heated bed reduce the load on the mainboard and help maintain stable temperatures. If you print large items or run the bed at high heat, these are upgrades you should strongly consider.
Improved Cooling Fans and Ducts
Print quality depends heavily on cooling, especially for overhangs and bridges. The stock fan setup on the A8 Plus works, but it is basic. Upgrading to a dual-fan setup or adding a part-specific cooling duct can drastically improve surface finish and fine detail. Plenty of printable ducts are available online, making this an affordable tweak with noticeable benefits.
3D Printed Frame Braces and Cable Chains
The A8 Plus is structurally better than the original A8, but it still benefits from reinforcement. Printed braces can help eliminate Z-wobble and vibrations, especially on taller prints. Cable chains not only organize your wiring but also prevent snags and wear. These upgrades are often made with the printer itself, giving users an immediate reward for their first few prints.
What we like most about the upgrade ecosystem is that it invites learning. You are not just printing objects; you are improving the machine that makes them. That builds confidence and a deeper understanding of how printers work, which is something that newer plug-and-play machines tend to lack.
Slicer Software Options
Another important piece of the Anet A8 Plus experience is the slicer software. Many users start with Cura, since it offers a strong community base and a wealth of pre-made profiles tailored for older Anet models. Others prefer PrusaSlicer or SuperSlicer for their advanced support customization and preview features. The A8 Plus is not locked into a proprietary slicer, which means you can experiment freely. You can adjust retraction settings, test different supports, and really dial in profiles that match your upgrades and material choices.
Comparisons With Its Competitors
If you're eyeing a DIY FDM 3D printer that you can make your own, the Anet A8 Plus still has skin in the game even in 2025. While many newcomers in the sub-$300 space have entered with better out-of-the-box usability, the A8 Plus holds its ground with modifiability, larger-than-average print volume, and a thriving modding community.
| Feature | Anet A8 Plus | Creality Ender 3 V3 | Anycubic Kobra | Elegoo Neptune 4 | Prusa Mini+ |
|---|---|---|---|---|---|
| Build Volume (mm) | 300 x 300 x 350 | 220 x 220 x 250 | 220 x 220 x 250 | 225 x 225 x 265 | 180 x 180 x 180 |
| Assembly | DIY Kit | Semi-assembled | Fully assembled | Semi-assembled | Semi-assembled |
| Bed Leveling | Manual (Upgradeable to ABL) | Manual | Auto (Inductive) | Auto (Proximity) | SuperPINDA Auto |
| Frame Type | Acrylic + Metal | Aluminum | Aluminum | Full-metal | Aluminum |
| Silent Drivers | No (Upgradeable) | Yes | Yes | Yes | Yes |
| Direct Drive | Optional Upgrade | No | Yes | No | No |
| Price Range (USD) | 180 to 220 | 220 to 270 | 270 to 320 | 290 to 350 | 429 to 499 |
While machines like the Ender 3 V3 and Neptune 4 offer better stock performance and quieter operation out of the box, they don't provide the same "tinker it yourself" that the A8 Plus fosters. The Kobra brings auto-leveling and direct drive standard, but it limits customization. And while the Prusa Mini+ is highly refined, it also costs significantly more and isn't quite as open to third-party mods.
What sets the Anet A8 Plus apart is its upgradability. It may not be the best at anything by default, but it's the only one on this list that invites you to make it better piece by piece. That matters if you want to learn and grow alongside your machine.
The learning curve is steeper, yes, and it will take patience and hands-on time. But in exchange, you get a printer that doesn't hold you back. You get to fix, tweak, and even redesign your machine. And that experience, of improving the printer as you improve your skills, is something prebuilt options rarely offer.
Our Final Verdict
The Anet A8 Plus isn't obsolete, but it's no longer an affordable printer or the budget darling it once was. It's for the builder, the tweaker, the DIYer who wants control more than convenience. If you're after the cheapest way to get a massive print area and you don't mind spending your first weekend assembling and upgrading, then yes, the A8 Plus is still a solid pick.
But if you want to print straight out of the box with minimal fuss, there are better options now. This printer isn't trying to be your first, it's trying to be your favorite project.
1. Anet3d.com, "Anet" Accessed July 26, 2022.

Scott Gabdullin is a Canadian entrepreneur, investor, and marketing expert who has successfully combined his passion for technology and innovation with a love for adventure and exploration.
Scott brings 12 years of digital marketing experience and a hardcore work ethic to his new passion for 3D printing. If he is not working on this business, he is likely travelling and Overlanding across North America with his wife and 2-year-old son in their Jeep Rubicon.
Read more →