Creality Ender 5 Printer Review
If you've been poking around the 3D printing community, you've probably heard the name Creality Ender 5 come up more than once. And for good reason. It's not the newest kid on the block, yet it's still one of the most talked-about printers in the hobbyist FDM scene.

Score breakdown
The stable cube-frame classic
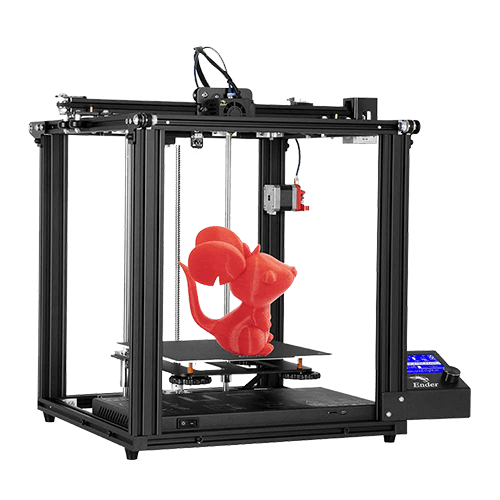
The Creality Ender 5 is a fused deposition modeling (FDM) 3D printer known for its cube-style frame and improved print stability. Unlike many budget-friendly printers that use a moving bed on the Y-axis, the Ender 5 holds the bed steady while the printhead moves along the X and Y axes and the bed raises and lowers along the Z. This makes it better suited for taller or more detailed prints, helping reduce wobble and improve layer consistency.
It offers a mid-sized build volume, a Bowden extruder setup, and an active community that supports everything from upgrades to slicer settings. The Ender 5 isn't the cheapest, nor the most advanced, but it hits a sweet spot for hobbyists who want a machine that's solid, dependable, and easy to improve over time.
An overview of the Creality Ender 5
Creality introduced the Ender 5 in early 2019 to fill a gap between budget-friendly machines like the Ender 3 and higher-end models that often come with a hefty price tag. The goal was to offer a printer that improves on the basics without alienating beginners or overcomplicating the setup for intermediate users.
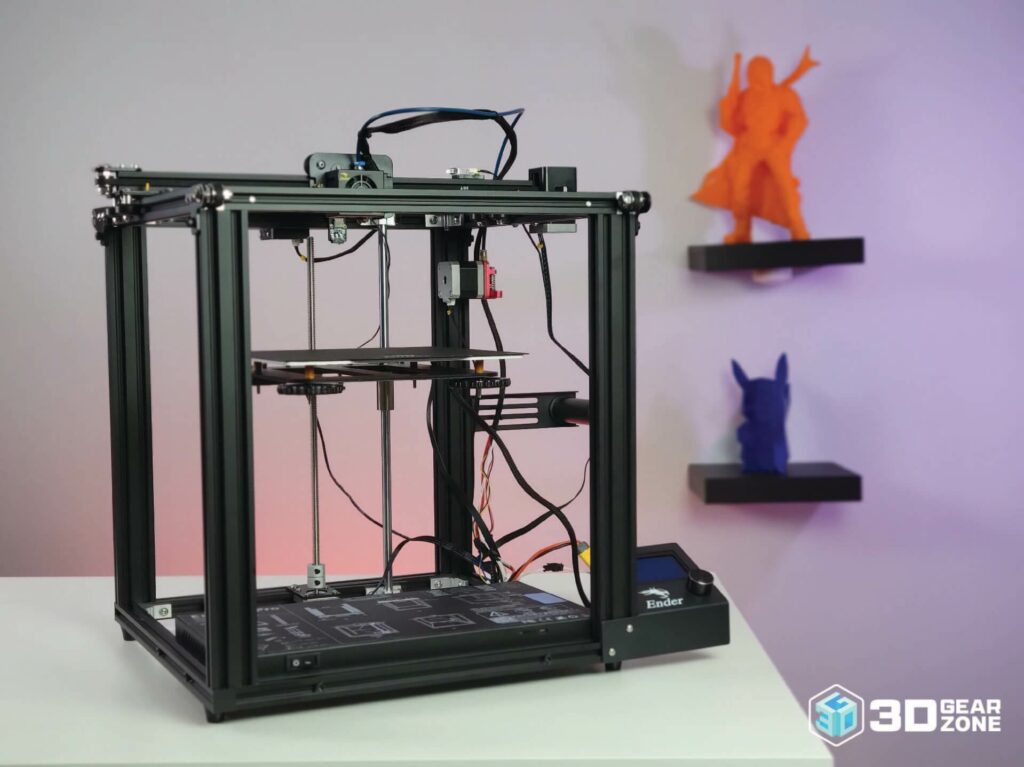
At first glance, the Ender 5 looks a bit different from the more familiar Ender 3. It features a box-like frame with a fixed bed and a gantry that moves the hotend along the Z-axis, a setup that provides better stability, especially during taller prints. With its solid build and relatively open design, it's become a favorite for those wanting a reliable step up without the price leap of more "professional" machines. It doesn't try to be flashy. Instead, it focuses on getting the fundamentals right: motion stability, decent print volume, and a frame that doesn't wobble when you breathe near it.
Unboxing and building the Ender 5
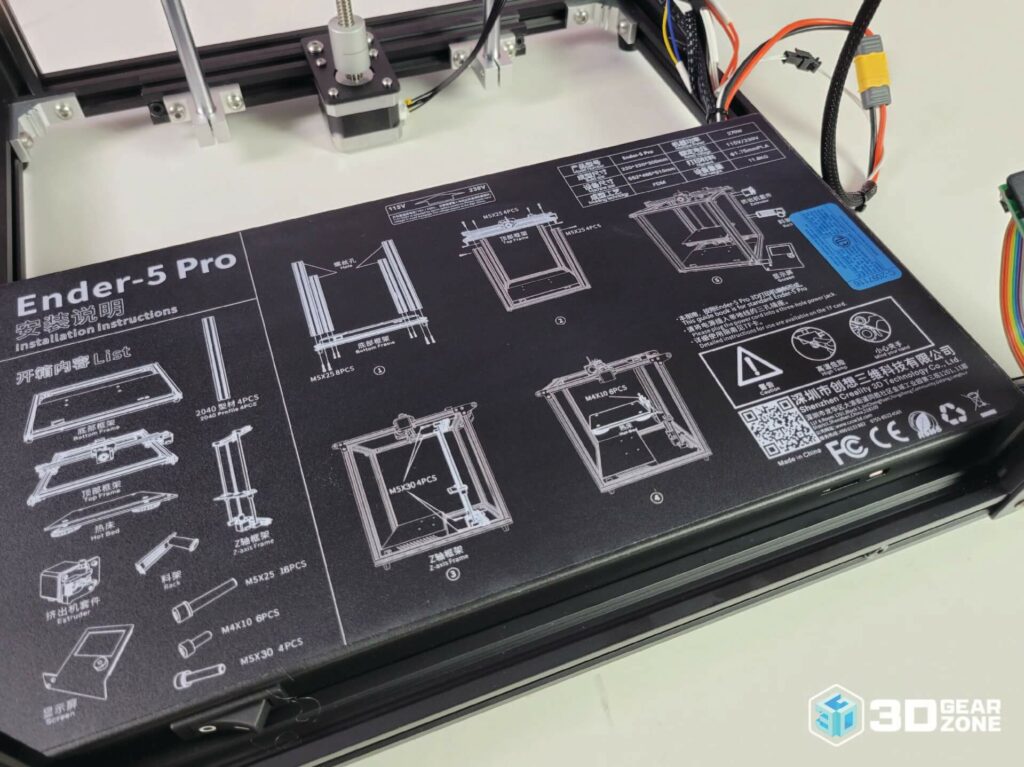
Setting up the Creality Ender 5 is an experience that eases you into 3D printing without intimidation. The printer ships are mostly preassembled and well-cushioned in thick foam, with all major parts placed in distinct layers to prevent movement during transit. You don't get the feeling that anything was hastily tossed in; every item has its own designated spot, and nothing feels loose or at risk of damage.
Once you lift the components out of the box, most of the work is simply mounting the Z-axis gantry onto the base, securing a few bolts, and connecting the labeled cables. There's no guesswork involved, and the instructions provided are visual and beginner-friendly. With a bit of focus, you can get the whole printer assembled and ready within an hour, even faster if you've built a kit before.
Leveling the bed is done manually using the large adjustment knobs under each corner. It's a hands-on process that uses the classic piece-of-paper method between the nozzle and the bed surface. While it doesn't have auto-leveling by default, once dialed in, the bed holds level for quite a while, especially with the Ender 5's stable frame.
Loading filament and running your first print is also straightforward. The menu interface is simple, the microSD card comes preloaded with test files, and the printer walks you through the steps with on-screen prompts. There's no maze of advanced options or settings to overwhelm you.
What's in the box
- ▪Creality Ender 5 printer (partially preassembled)
- ▪Z-axis gantry and base frame
- ▪Magnetic heated bed (pre-attached)
- ▪Tool kit with Allen keys and nozzle cleaner
- ▪MicroSD card and USB adapter
- ▪Sample PLA filament
- ▪Spare nozzle and Bowden fittings
- ▪Power cable
- ▪Printed user manual with illustrations
Building the Ender 5
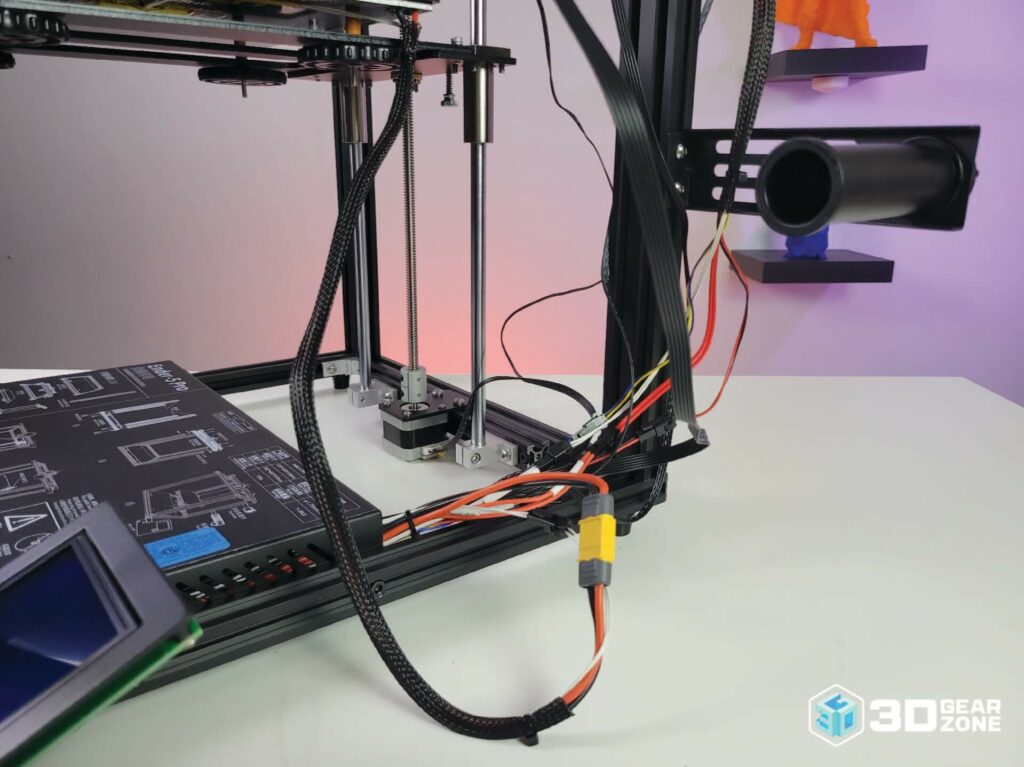
One of the things that makes the Creality Ender 5 appealing to hobbyists is how easy it is to get started. While not fully assembled out of the box, it strikes a good balance between being hands-on and not overwhelming. The base, gantry, and major wiring are already preconfigured, meaning you won't be building a printer from scratch. Instead, setup involves mounting the gantry to the base, plugging in labeled cables, and tightening a few bolts, no soldering or deep firmware flashing required.
The design clearly favors functionality over flair. The cube-style frame comes together with minimal alignment fuss, and the wiring harnesses are bundled neatly. Users who've assembled other Creality models often say this is one of the easier setups from the brand, especially considering the machine's rigid structure.
Once assembled, the touchscreen interface boots reliably, the menu is intuitive, and you can be loading filament and running your first test print in no time. Most users can complete the full build and calibration in under an hour, even if it's their first time handling a 3D printer.
| Setup Step | Estimated Time | What to Watch For | Helpful Tip |
|---|---|---|---|
| Unboxing & Placement | 10–15 minutes | Lifting and positioning the base | Keep the foam packaging in case you move the printer |
| Packaging Removal | 5 minutes | Small tools may be taped in pockets | Double-check under flaps before discarding foam |
| Gantry Assembly | 10–15 minutes | Aligning the gantry flush with the base | Do not overtighten screws on the first try |
| Wiring & Connections | 5–10 minutes | Cable routing and connector matchups | Cables are labeled to avoid confusion |
| Manual Bed Leveling | 5–8 minutes | Proper nozzle-to-bed spacing | Use a sheet of paper to check resistance |
| Test Print Setup | 10 minutes | Feeding filament and test file prep | Use included PLA sample and print from microSD card |
Initial impressions
Out of the box, the Ender 5 gives off a vibe of structure and capability. The cube-style frame doesn't just look sturdy, but it actually feels it. Compared to other budget printers I've handled, this one doesn't shake or wobble during prints, which really pays off on taller projects.
The magnetic bed is convenient and works decently for PLA. That said, we eventually swapped for a glass bed to improve first-layer consistency on longer prints. The stock bed gets the job done, but if you're printing regularly, upgrading can make a noticeable difference.
The firmware works fine for basic tasks, but we found ourselves wanting more control not long after getting familiar with the menu. Flashing Marlin was a quick and worthwhile upgrade. It added features like thermal runaway protection and just gave us more peace of mind during longer prints.
Design and Technical Specifications
The Creality Ender 5 was built with a focus on mechanical stability and practical improvements over typical budget printers. Its standout feature is the stationary build platform, which only moves vertically along the Z-axis. This design shift, compared to the front-to-back Y-axis movement seen in most printers like the Ender 3, significantly cuts down on vibration and improves consistency during tall prints.
It features a 220 x 220 x 300 mm build volume, larger than many starter machines without taking up a huge footprint on your desk. The frame is an all-metal cube, which gives the printer a rigid structure and better resistance to shifting, especially during long or high-speed prints. That extra stiffness really comes into play when you're printing larger items.
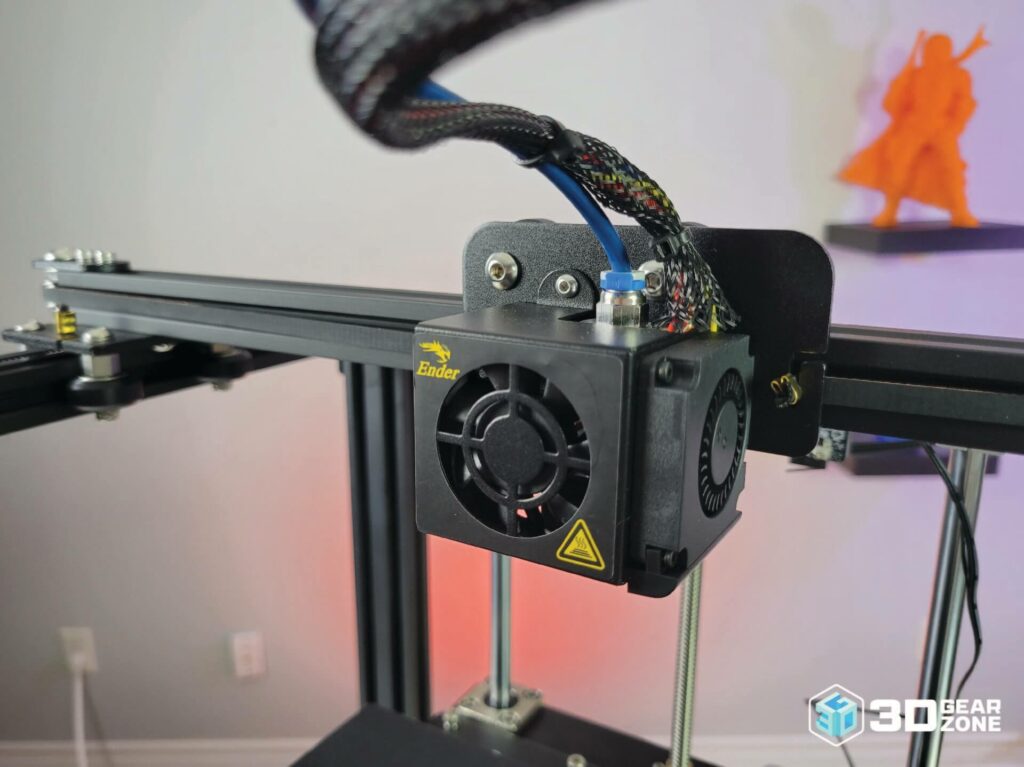
Instead of a direct drive, the Ender 5 uses a Bowden extruder setup, which helps keep the printhead lighter and more agile. It handles standard filaments like PLA and PETG well, but more flexible materials like TPU may need some tuning or upgrades.
There's no auto bed leveling by default, but the large adjustment wheels under each corner make manual leveling straightforward. Once the bed is dialed in, it tends to stay level for long stretches, thanks to the sturdy frame and minimal mechanical drift.
Connectivity is basic but reliable, with printing options through microSD or USB. The stock control screen is a no-frills interface, but it responds quickly and gives you everything you need to start and monitor prints. It doesn't overwhelm you with options, but it's functional and easy to learn.
Specs at a glance
- ▪Build Volume: 220 x 220 x 300 mm
- ▪Print Bed: Magnetic, heated, removable (upgradable)
- ▪Layer Resolution: 0.1 – 0.4 mm
- ▪Connectivity: SD card, USB
- ▪Nozzle Diameter: 0.4 mm (standard)
- ▪Max Nozzle Temperature: 255°C
- ▪Max Bed Temperature: 110°C

Print Performance and Quality
Print quality on the Ender 5 can be impressive once things are dialed in. The rigidity of the cube-style frame really comes into play on tall or complex models, where it helps keep layers aligned and corners clean, especially during longer prints. We've seen it on 20 to 30-hour runs without any visible Z-wobble or frame shifts. The consistency has also been reliable.
PLA prints look great straight out of the box, with smooth surfaces and good dimensional accuracy. ABS is achievable, too, but it requires a controlled environment or at least an enclosure to prevent warping. PETG also runs well, though stringing can pop up unless your retraction settings are well-tuned. As for TPU, the Bowden setup isn't ideal for soft materials, but with slower speeds and a tighter filament path, we were able to get usable results. That said, a direct drive upgrade made a noticeable difference.
Slicing is straightforward thanks to widely available Cura profiles and years of community tuning. You're not starting from scratch. We found that minor adjustments to flow rate and retraction made a big impact on print finish. Overall, the Ender 5 is capable of clean, repeatable results across a variety of filaments as long as you're willing to do a bit of tuning along the way.
Test Print and Benchmark Results
To evaluate the real-world performance of the Creality Ender 5, we ran a mix of test prints that covered a wide range of functional and visual benchmarks. These included calibration cubes, thin-wall prints, miniatures with fine details, unsupported overhangs, and tall mechanical objects. These are the same types of models that most hobbyists rely on when tuning a new machine.
| Test Type | Result Highlights | Observations |
|---|---|---|
| Dimensional Accuracy | Within 0.1 mm of the intended dimensions | Slight under-sizing on external features, easily correctable |
| Overhang Test | Clean up to 60 degrees | Slight curling beyond that, especially without supports |
| Fine Detail Print | High resolution on small details | Text features and miniature ridges came out sharp and clean |
| Tall Print Stability | No leaning or Z-banding | The frame held position well over 20+ hour printing sessions |
| Layer Uniformity | Smooth and consistent surface finish | Minor ringing only at very high speeds |
For its price range, the Ender 5 consistently delivered results that felt comparable to more expensive machines. It may not be packed with extra features, but its core motion system and frame quality are solid. Once the slicer settings were dialed in, we were able to achieve consistent and accurate results across multiple materials.
Firmware, Tuning, and Calibration
The Ender 5 comes with basic firmware that handles the essentials. The interface uses a rotary dial and a simple LCD screen. It is not flashy, but it gets the job done. For users who want more safety features or control, flashing firmware like Marlin unlocks thermal protection and PID tuning.
Right out of the box, the machine works well with Cura and PrusaSlicer default profiles. That said, we spent some time tuning key values like nozzle temperature, retraction, and Z offset. These small adjustments made a noticeable difference in print quality.
One standout trait of the Ender 5 is how well it holds its level. Once we completed the manual bed leveling using the paper method, the bed stayed level for weeks of regular printing. The machine's rigid frame and sturdy design definitely help here.
When we tested various materials, PLA performed reliably at around 200°C with a 60°C bed. PETG also did well, especially after slowing down the print speed and increasing the nozzle temperature to 235°C. TPU worked with some limitations. We needed to slow the print and tighten the filament path, but it was still usable. Retraction tuning made a big difference in all cases.
Although it does not come with a BLTouch or auto bed leveling by default, it supports both. Adding a probe was straightforward, and plenty of guides are available online to walk through the installation and firmware update.
Once the machine is tuned and leveled, it becomes very consistent. The firmware does not get in the way. And if more control is needed, upgrades are easy to integrate without replacing the core of the machine.
Possible Upgrades for the Ender 5
One of the strongest aspects of the Creality Ender 5 is how well it responds to upgrades. While the base machine is solid, its open design and active community support make it a great platform for modding.
Silent Mainboard
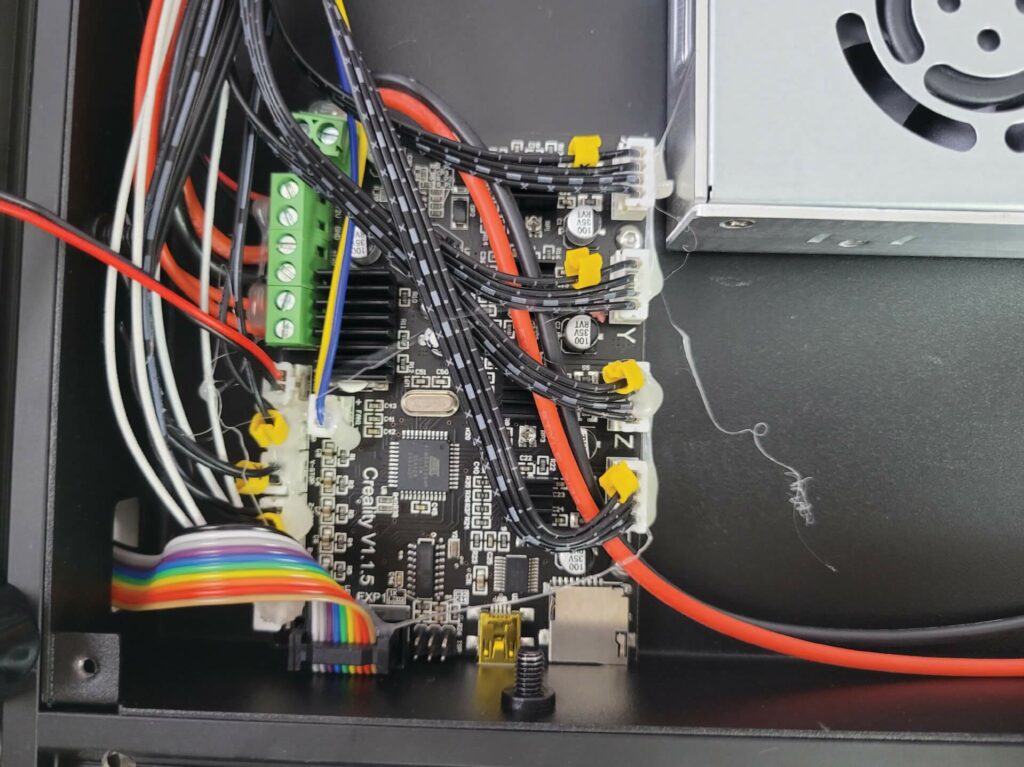
The default stepper drivers on the stock board can get noisy during prints. Upgrading to a silent mainboard, such as the 4.2.7 version with TMC2208 or TMC2209 drivers, dramatically reduces motor noise. We noticed a major difference in how quietly the machine operates after this change, especially during longer jobs or overnight prints.
Glass or PEI Build Surface
The magnetic bed that comes with the Ender 5 is convenient, but it can wear out over time. Swapping it for a borosilicate glass plate or a PEI-coated sheet improves adhesion and longevity. We found that using a glass bed also helped keep prints flat and reduced warping on larger models.
Direct Drive Extruder
The stock Bowden setup works well for PLA and PETG, but flexible filaments like TPU tend to jam or print inconsistently. Adding a direct drive extruder places the motor directly above the hotend, shortening the filament path. After this upgrade, our TPU prints showed better extrusion control and fewer retraction issues.
Auto Bed Leveling Sensor (BLTouch or CR Touch)
Manual bed leveling can be tedious, especially if we print frequently or switch build surfaces. Installing a BLTouch or CR Touch auto bed leveling probe automates this process and helps maintain first-layer consistency. Setup takes a bit of time and requires flashing firmware, but once done, the machine handles Z-offset calibration more reliably.
OctoPrint Setup
Adding a Raspberry Pi running OctoPrint gives us remote access to the printer. We can monitor print jobs, control temperatures, and even capture time-lapse footage with a connected webcam. It also streamlines file uploads and removes the need to swap microSD cards between the computer and printer.
Maintenance, Upkeep, and Reliability
Keeping your Ender 5 running smoothly does not take a lot of work, but it does require some regular attention. The good news is that most of the upkeep tasks are simple and can be done quickly with basic tools.
Build surface care
The Ender 5 uses a magnetic build surface that offers decent adhesion for PLA and other standard materials. However, over time and with frequent use, the surface can become scratched, warped, or coated in residue from prints. You should clean the surface regularly using 90 percent or higher isopropyl alcohol to remove dust, oils, and leftover filament bits.
Avoid using metal scrapers aggressively, as these can gouge the surface and make adhesion worse. If you notice prints starting to lift or warp at the edges, consider upgrading to a borosilicate glass plate or PEI-coated sheet for a flatter and more durable surface. Always make sure your bed is clean before every print.
Belt tension and alignment
Loose belts are a common reason for inconsistent layers or misaligned prints on the Ender 5. It uses open-loop GT2 belts on the X and Y axes, both of which need to be checked for proper tension. Press the belts gently and see if they flex too much. If they do, use the built-in thumb tensioners to adjust them until they feel snug. You should also inspect the stepper pulleys to confirm that the grub screws are tight and positioned correctly against the motor shaft's flat section. Misaligned belts or shifting pulleys can create wavy lines and cause layer shifts, so take a few minutes every couple of weeks to verify everything is tracking straight.
Z-axis lubrication
The Ender 5's Z-axis is driven by a single lead screw that lifts the entire bed assembly. This lead screw should always operate smoothly. We clean the screw every month using a dry cloth and then apply PTFE or lithium grease to keep it moving quietly. If you hear squeaks or the bed seems to stick on the way up or down, it's time to re-lubricate. You should also check that the brass lead nut is not wobbling or coming loose from its mount. A dirty or dry Z-axis can lead to banding and minor artifacts in tall prints, especially if left unchecked.
Hotend and Bowden tube maintenance
Many print quality problems on the Ender 5 can be traced back to the hotend or Bowden tube. After about five to ten prints, heat up the nozzle and clean off any plastic buildup using a brass wire brush. If extrusion becomes uneven, run a cold pull with cleaning filament or nylon to clear partial clogs. The PTFE Bowden tube should also be checked regularly. It must sit flush against the nozzle to prevent leaks or jams. If the tube becomes discolored, brittle, or too loose to stay locked in place, trim the end or replace it entirely. Always re-secure it with a proper clip to keep tension consistent.
Fan and airflow cleaning
The Ender 5 has several cooling fans that attract dust over time. You will find one on the hotend, one for part cooling, and others inside the power supply and mainboard enclosure. Power off the machine and use compressed air or a soft brush to remove buildup every few weeks. Clean fan blades help maintain proper airflow, which is critical for stable extrusion temperatures. Also check that the hotend's aluminum heatsink is not obstructed. If a fan stops spinning or makes grinding noises, replace it promptly to avoid thermal shutdowns or inconsistent extrusion.
Firmware and software updates
Out of the box, the Ender 5 uses a stock firmware that works fine for basic printing. If you plan to add upgrades like BLTouch auto bed leveling or want better thermal safety, you will need to flash custom firmware like Marlin.
Start by confirming your control board version. Download the correct configuration files and flash using Cura or a dedicated bootloader tool. Follow step-by-step video guides to avoid bricking the board. After flashing, always test the bed leveling and motion controls before starting a print. Firmware updates can fix small bugs, improve motion stability, and enable advanced features that extend the printer's capabilities.
Frame and hardware inspection
The Ender 5's cube-like frame is sturdy, but it can loosen up over time with regular use. Every few weeks, grab your Allen keys and check all screws on the frame, gantry, and motor mounts. Look for any signs of wobble in the bed or print head. Focus especially on the V-slot wheels that guide movement on all axes. These wheels should roll smoothly with slight resistance. If they spin freely or feel too tight, adjust them using the eccentric nut. Keeping the mechanical components firm and square will help you avoid sudden print quality drops or calibration drift.
Comparisons with Ender 5 Competitors
When you're shopping for a 3D printer in the mid-range FDM category, the Creality Ender 5 is still one of the most talked-about machines. It hits a nice balance between structural stability, modding potential, and affordability. While there are newer models with flashier features, the Ender 5 continues to win over users who prefer reliability and flexibility in a printer they can tinker with and trust.
| Feature | Prusa Mini Plus | Anycubic Kobra | Sovol SV04 | Creality Ender 5 |
|---|---|---|---|---|
| Build Volume (mm) | 180 x 180 x 180 | 220 x 220 x 250 | 300 x 300 x 400 | 220 x 220 x 300 |
| Auto Bed Leveling | Yes (Mesh) | Yes | Yes | No |
| Direct Drive | No | Yes | Yes (Dual) | No |
| Special Features | Excellent firmware, great support | Beginner-friendly, fast setup | Independent dual extruders | Mod-friendly, stable cube frame |
| Price Range (USD) | $399 – $449 | $259 – $299 | $429 – $499 | $280 – $350 |
The Creality Ender 5 has a strong cube frame that gives it superior rigidity compared to many gantry-style printers. That design results in better performance on tall prints and more stability during long print jobs. While it does not come with auto bed leveling or a direct drive setup out of the box, it appeals to users who enjoy upgrading and customizing their machines. If you are someone who values long-term use and a mod-friendly structure, the Ender 5 can grow with your skills.
The Prusa Mini Plus offers a well-rounded experience right out of the box. It provides mesh bed leveling, excellent firmware, and top-tier customer support. Although the build volume is smaller than the Ender 5, the consistent performance and minimal learning curve make it a great fit for beginners or users who prefer a plug-and-play solution. It is more expensive than the Ender 5, but if you prioritize reliability and ease of use over size or modding, the Mini Plus is a smart option.
The Anycubic Kobra is built with first-time users in mind. It includes auto bed leveling and a direct drive extruder, which makes it easier to handle flexible filaments and simplifies setup. While its frame does not match the rigidity of the Ender 5, and its build height is slightly shorter, it provides excellent value for the price. If convenience and affordability matter more to you than long-term modding potential, the Kobra is an attractive alternative.
The Sovol SV04 is targeted at experienced users who need more capability. With independent dual extruders, dual direct drives, and auto bed leveling, it supports complex, multi-material prints and larger models. However, it is a heavier and more demanding machine in terms of management. If your focus is on advanced functionality and versatility, the SV04 is worth it. But if you prefer a solid, mod-ready platform to start and grow with, the Ender 5 still holds its own.
Our Final Verdict
The Creality Ender 5 remains one of the most reliable FDM printers you can pick up in 2025. It skips flashy extras in favor of core stability and print consistency. You won't get features like a touchscreen or direct drive right out of the box, but what you do get is a machine that prints well, stays stable over time, and can be easily customized.
For anyone serious about learning the ins and outs of 3D printing, the Ender 5 offers a great foundation. It helps you focus on improving your prints rather than troubleshooting constant hardware quirks. And if you decide to upgrade later, many of those improvements can be added to your existing Ender 5 instead of forcing you to buy an entirely new printer.
If you're printing miniatures, functional parts, or just starting out with FDM, the Ender 5 is the kind of machine that keeps working long after trendier printers lose their appeal. It's dependable, customizable, and still one of the most rewarding printers to own.

Scott Gabdullin is a Canadian entrepreneur, investor, and marketing expert who has successfully combined his passion for technology and innovation with a love for adventure and exploration.
Scott brings 12 years of digital marketing experience and a hardcore work ethic to his new passion for 3D printing. If he is not working on this business, he is likely travelling and Overlanding across North America with his wife and 2-year-old son in their Jeep Rubicon.
Read more →