Anycubic Chiron 3D Printer Review
The Anycubic Chiron might be a giant in size, but it's surprisingly easy to live with. If you've been itching to create large-scale prints without dealing with overly complex machines or shelling out a ton of cash, the Chiron is worth a closer look. This beast of a printer combines a massive build volume with user-friendly features, offering a sweet spot for creators who want to go big without getting overwhelmed.

Score breakdown
Going big without the big headaches
The Anycubic Chiron first made waves in 2018 as a large-format printer that delivered serious build volume without demanding a fortune. It introduced a spacious build area, assisted mesh leveling, and a direct drive setup that quickly caught the attention of hobbyists and makers alike. The result was a printer capable of producing large models in one piece while maintaining good layer consistency and adhesion across its generous build plate.
What helped the Chiron build its reputation was how well it fit into the broader 3D printing community. There's a wide selection of compatible filaments and plenty of guides, forums, and user reviews that help smooth the learning curve. Whether you're searching for slicer profiles, leveling tips, or wiring mods, chances are someone has shared a solution.
The Chiron played a key role in making large-scale FDM printing more accessible. By offering capabilities once limited to expensive industrial machines at a reasonable price, it opened new creative possibilities for cosplay builders, designers, and serious hobbyists.
An overview of Anycubic and the Chiron
Anycubic has grown into a familiar name in consumer 3D printing, carving out a space for itself by offering machines that combine solid performance with reasonable prices. Since its founding, the company has released a lineup of both resin and FDM printers that lowers the barrier of entry for hobbyists, educators, and small businesses alike.
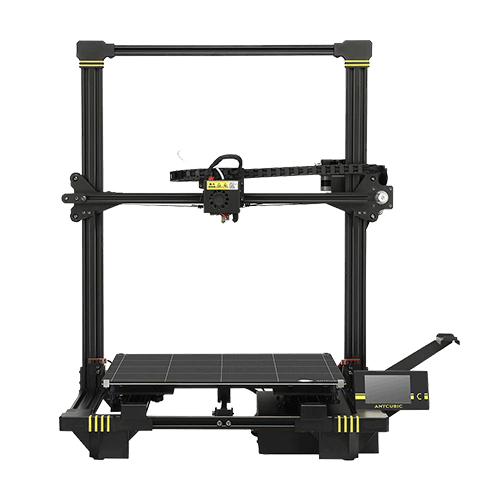
The Chiron is Anycubic's large-format offering, and it pushes the boundaries of what's possible at home or in your workshop without forcing you into a pricey, industrial-grade machine. Its massive 400 x 400 x 450 mm build volume lets you print entire helmets, cosplay armor, or large functional prototypes in a single go. No slicing into pieces required.
What makes the Chiron especially appealing is how it balances size with usability. It doesn't overwhelm you with technical hurdles. Instead, it features mesh-assisted leveling, a user-friendly touchscreen, and a sturdy frame that makes large-scale printing feel less like a gamble and more like an achievable project. Anycubic clearly listened to their community with this one, packing in practical features without jacking up the price.
They've also earned a loyal following thanks to accessible support, an active user base, and a growing ecosystem of parts and mods. If you're looking for a big machine that doesn't come with big headaches, the Chiron makes a strong case.
Unboxing and building the Anycubic Chiron
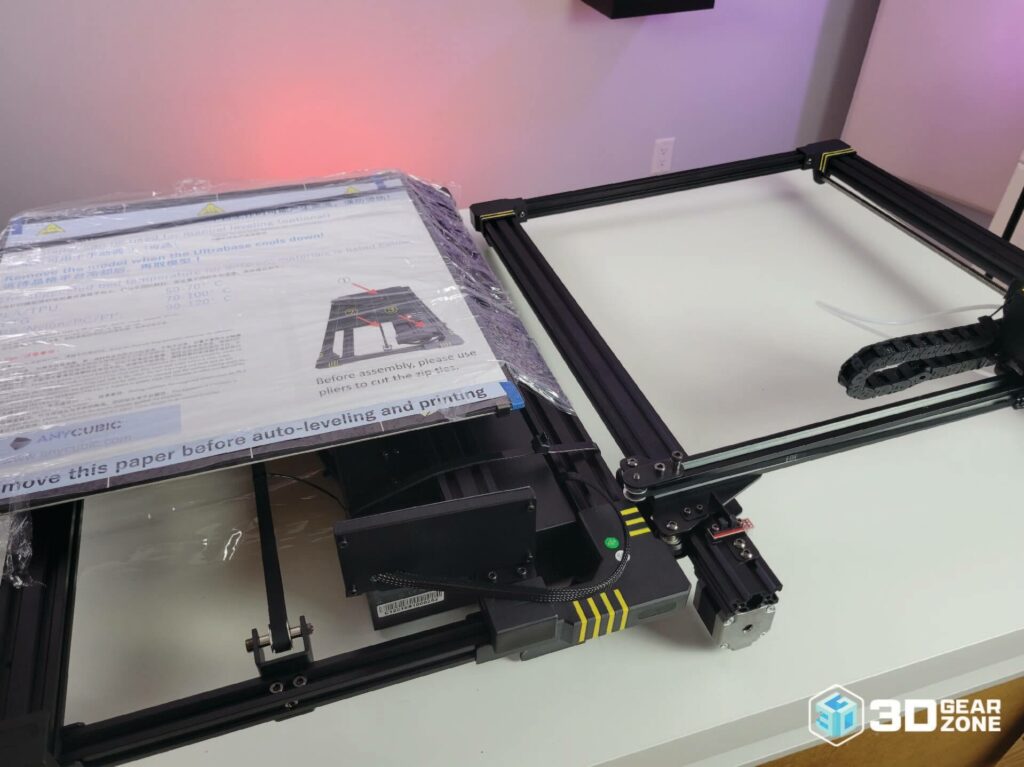
Getting Anycubic Chiron ready to print is surprisingly straightforward, especially for a machine of its size. When you unbox it, you'll find a well-protected kit that's mostly pre-assembled. The clear, step-by-step instructions guide you through connecting the main frame sections, like securing the gantry to the base, and then handling the wiring. What's truly helpful is that the connections are often color-coded, eliminating guesswork and ensuring you plug everything in correctly the first time.
What's in the box
- ▪The Anycubic Chiron printer, mostly pre-assembled
- ▪Toolkit for assembly and maintenance (screwdrivers, Allen keys, wrenches)
- ▪Spatula for removing prints
- ▪Gloves for safe handling
- ▪Small sample spool of filament
- ▪USB drive loaded with test files and slicing software
- ▪Power cord and USB cable
- ▪User manual and quick-start guide
Assembly and setup
Although the Chiron arrives mostly pre-assembled, setting it up and running still takes time and care. You'll need to secure the gantry onto the base and finish routing cables, both of which require attention to detail to avoid alignment issues or messy wiring. These steps aren't overly complex, but they can be time-consuming, especially if it's your first large-format printer.
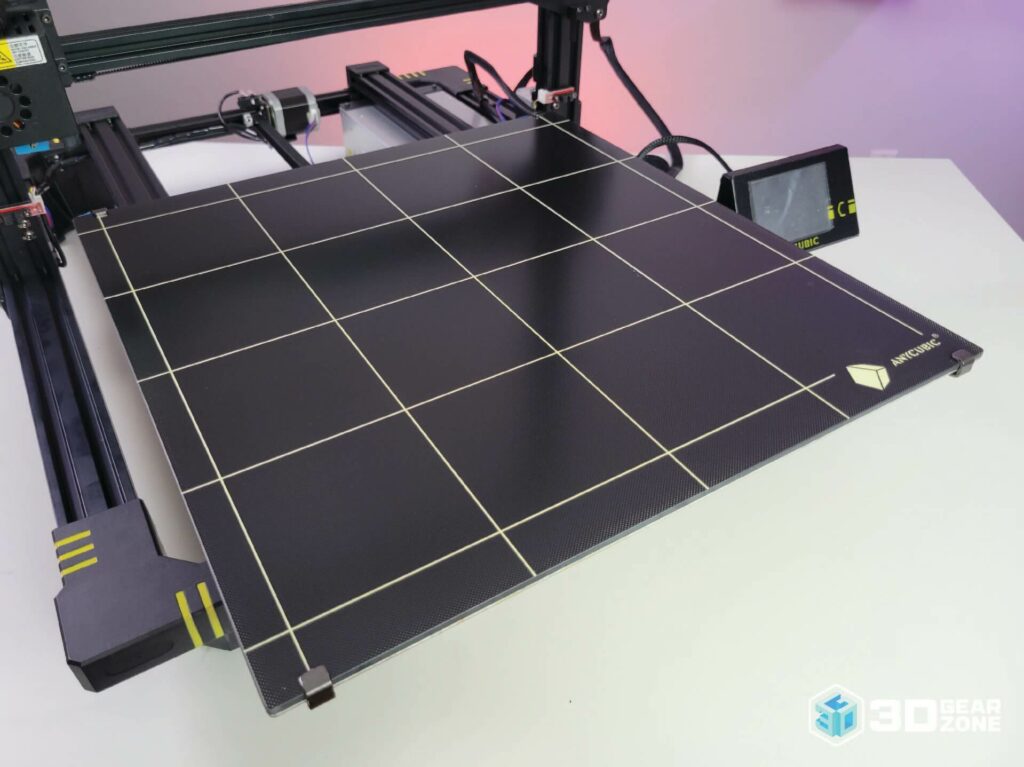
One big part of setup is leveling the bed. Since the print bed area is so massive, this step can feel a little intimidating. Luckily, the printer includes an auto-leveling sensor that helps you get things aligned. You may still need to do a bit of fine-tuning, but once you find that sweet spot, adhesion to the Ultrabase Pro surface becomes incredibly reliable.
| Stage | Time Estimate | Key Challenges | Tips / Notes |
|---|---|---|---|
| Bolting the gantry to the base | 15-30 minutes | Lining up parts and tightening bolts without over-torquing | Work on a level surface, and don't rush the tightening process. |
| Routing cables | 20-40 minutes | Keeping cables tidy and out of the way | Use zip ties to secure cables neatly and prevent snags during operation. |
| Bed leveling | 15-30 minutes | Covering its large bed area evenly | The auto-leveling sensor helps, but double-check with a manual test print. |
| Fine-tuning adhesion | 10-20 minutes | Finding the perfect Z-offset for consistent adhesion | Print a large skirt or test square to verify settings before big prints. |
Initial impressions and build quality
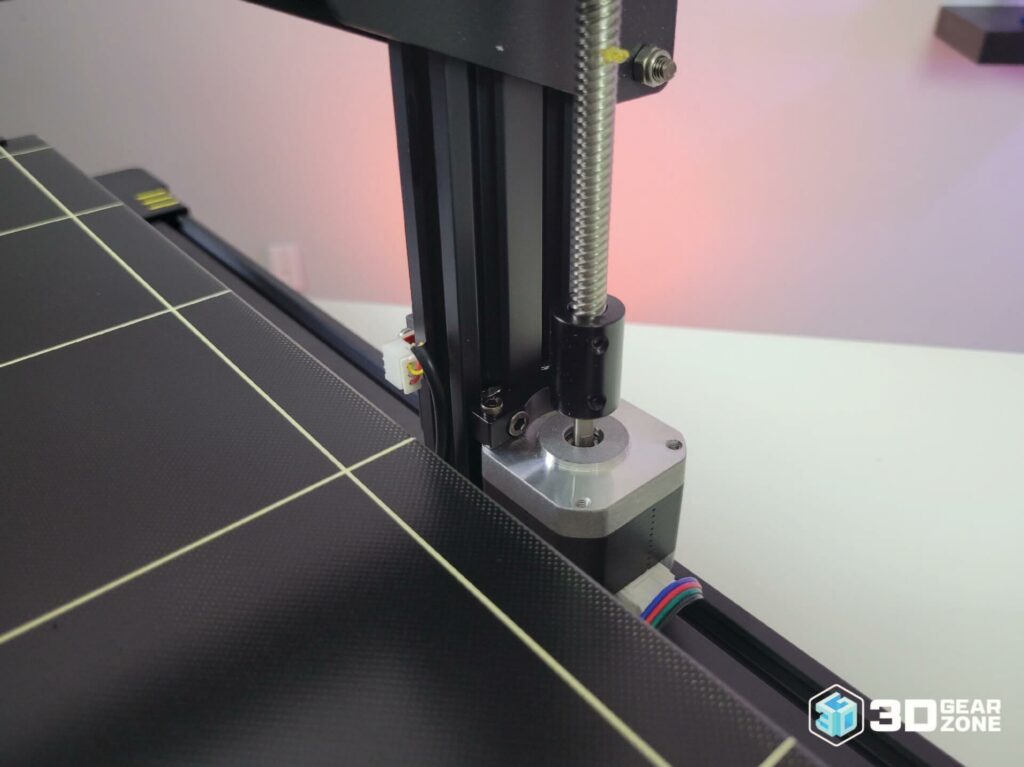
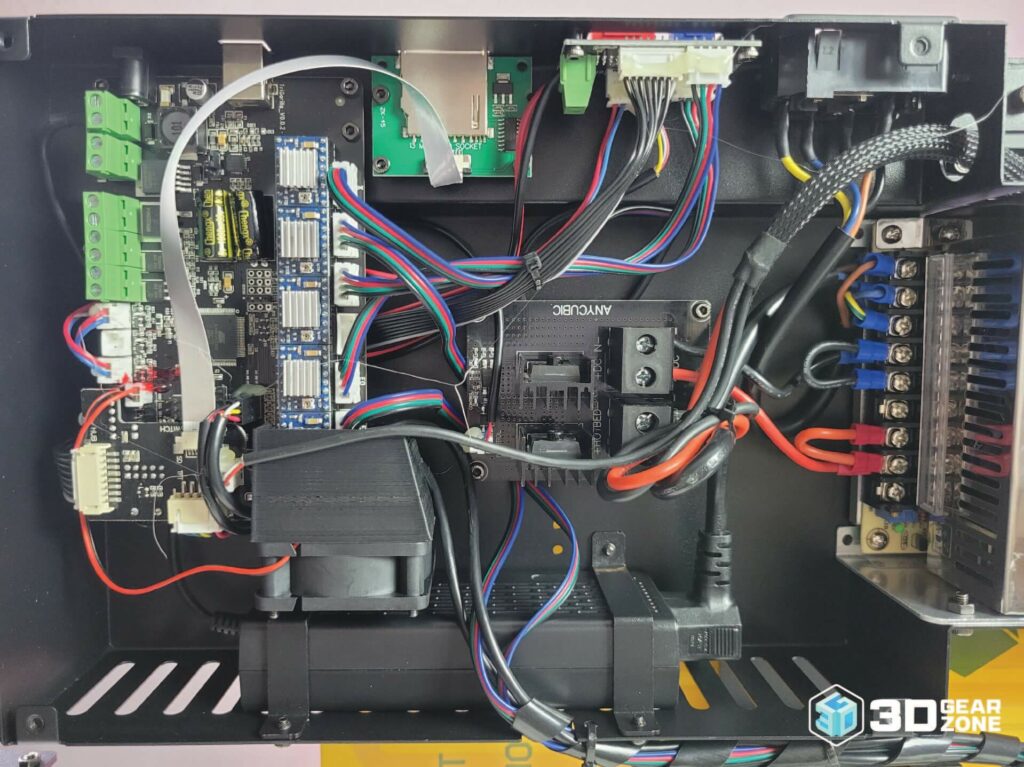
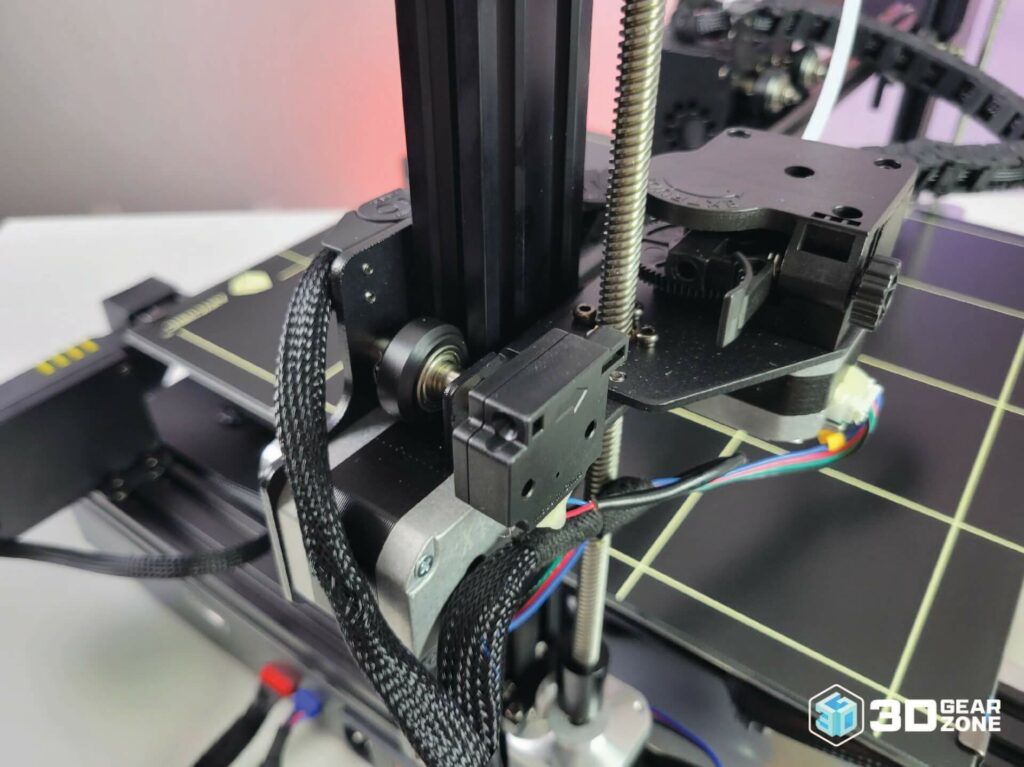
One of the first things you'll notice about the Chiron is its size and weight. It's a beast, but it's built to last. The aluminum frame feels solid, with enough reinforcement to prevent wobbling during tall prints. Dual Z-leadscrews help keep the gantry moving smoothly, and the top support rods provide that extra bit of stability that helps when you're working with tall layers.
That said, quality control can be hit or miss. Some users have reported issues like loose wiring or slightly misaligned components straight out of the box. These aren't deal breakers if you're comfortable tightening a few screws or re-seating a connector, but it's something to be aware of. Still, once set up correctly, the Chiron feels like a solid, dependable workhorse.
Design and technical specifications
Functionality comes first in the Chiron's design. It's large, but the layout makes sense and doesn't waste space. Everything from the touchscreen to the extruder is placed with usability in mind. For example, the Titan-style direct drive extruder makes flexible filaments like TPU easier to handle than you'd find on Bowden-style machines.
Then there's the hotend, a Volcano-style setup that can push a high volume of melted filament. That's exactly what you want if you're printing thick layers or tall objects where speed and strength matter more than ultra-fine detail.
Specs at a glance
- ▪Build volume: 400 x 400 x 450 mm
- ▪Printing technology: FDM
- ▪Nozzle diameter: 0.4 mm by default (upgradable)
- ▪Max print speed: 100 mm/s (most run 60–80 mm/s)
- ▪Bed leveling: Mesh-based assisted manual leveling
- ▪Heated bed: Yes, Ultrabase Pro with great adhesion
- ▪Connectivity: USB drive and SD card
- ▪Filament compatibility: PLA, ABS, PETG, TPU, and others
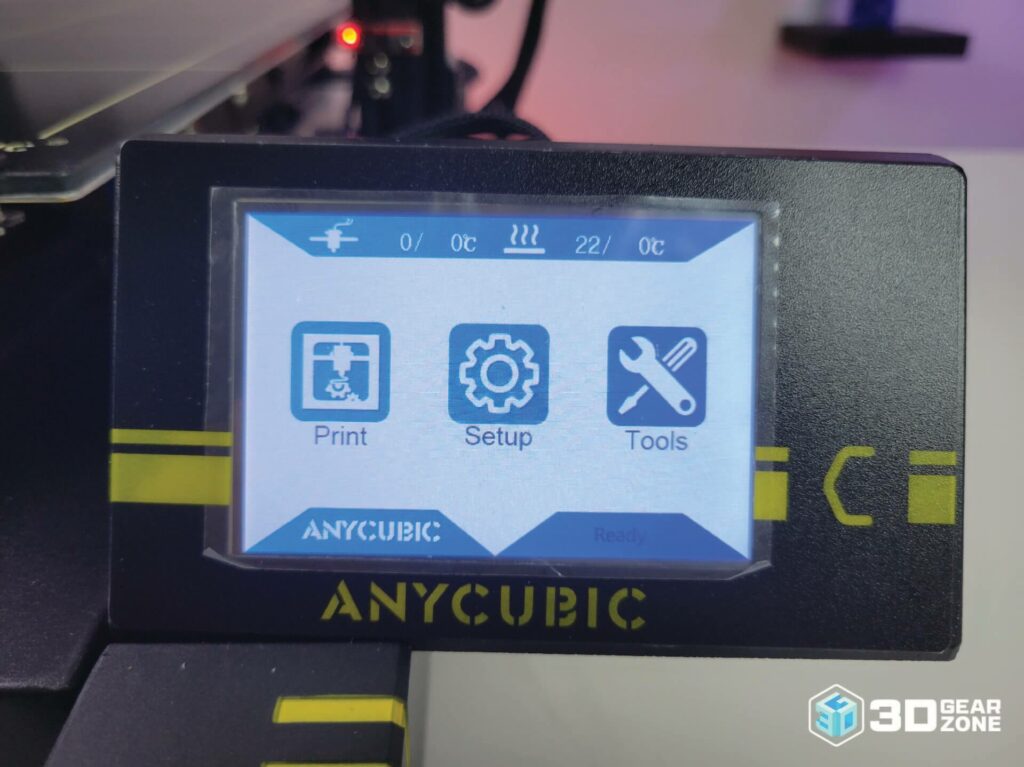
- ▪Touchscreen: 3.5-inch full color, easy to use
Test print highlights
We ran a variety of test prints to see how well the Chiron performs in practical use. This included printing a large helmet model to check for smooth curvature and adhesion across wide areas, bridging tests to observe how well it handled unsupported spans, dimensional accuracy models to gauge precision, and a fine-detail Benchy to push its ability with small features. The results were promising: surface finishes were generally clean, curves came out well, bridges held up with minimal sagging, and accuracy stayed within reasonable limits. Even on trickier prints like lattice structures or fine text, the Chiron handled the task with solid consistency.
| Test Type | Result Highlights | Observations |
|---|---|---|
| Large Helmet Print | Clean curvature, smooth outer wall, minimal warping | Adhesion held up well. Slight Z-banding is visible on high-speed sections. |
| Bridging Test | 30mm bridges are successful, with minor sagging at 40mm | Active part cooling is effective. |
| Dimensional Accuracy Test | Off by 0.2mm on X and Y, 0.1mm on Z | Minor adjustments in slicer settings improved this. |
| Fine Detail Benchy | Soft corners, stringing between features | Lower nozzle temps and retraction tweaks helped. |
Upgrades worth considering
The beauty of the Anycubic Chiron is its immense upgradability, turning it into a truly long-term investment. You can truly transform this machine to suit your specific needs and push its performance boundaries:
Direct Drive Extruder
Many users opt for a direct drive conversion (replacing the stock Bowden extruder with an E3D Hemera or BMG clone, for example). This brings the extruder motor directly above the hotend, leading to vastly improved extrusion consistency, significantly reduced stringing, and the ability to reliably print challenging flexible filaments like TPU with much greater ease and precision.
Motherboard Upgrade
Switching to a modern 32-bit board (such as an SKR mini E3 or BTT Octopus) can dramatically enhance performance. These boards often support advanced features like Trinamic stepper drivers, which enable incredibly quiet operation and smoother motor movements, and open the door to powerful firmware options like Klipper or more advanced Marlin versions.
Linear Guides / Z-axis Stabilizers
Given the large, moving print bed, vibrations can sometimes affect print quality, especially on very tall models. Adding robust linear guides to the X/Y axes or more substantial Z-axis stabilizers can significantly improve print quality by virtually eliminating wobble and vibrations, leading to cleaner, more consistent layers throughout your prints.
Improved Part Cooling
The stock part cooling fan can sometimes be insufficient for demanding prints, especially those with aggressive overhangs or bridges. Upgrading the hotend fans or designing and printing better fan shrouds (like a Hero Me or Petsfang setup) can dramatically improve your prints' ability to handle overhangs and bridges, resulting in cleaner features and fewer print failures.
PEI Spring Steel Sheet
While the Ultrabase is excellent, a flexible PEI spring steel sheet system offers even easier print removal. You simply flex the sheet, and your prints pop right off, minimizing the risk of damage and speeding up your post-processing workflow.
Thermal Runaway Protection
For older firmware versions, robust thermal runaway protection is absolutely critical for safety. This is often achievable with a simple firmware update to a more recent Marlin build or, for advanced users, installing external MOSFETs for the bed and hot end to provide an extra layer of safety.
Common issues with the 3D printer
The Anycubic Chiron delivers great size for the price, offering one of the largest build volumes in its class while staying budget-friendly. That said, users do run into a few common problems that can affect print reliability and overall experience if not addressed.
- ▪Auto-leveling fails or loses calibration: Some users encountered issues where auto-leveling didn't hold settings or produce uneven prints. They fixed it by doing a manual level first (paper method at each corner and center) before running the auto-level. Others checked sensor connections and updated firmware for better stability, and took time verifying the first layer with a test print.
- ▪Print stops mid-job: A few people reported prints stopping early, often traced back to loose bed or thermistor wiring, or SD card issues. They solved it by securing connectors, replacing or reformatting SD cards, and checking cables for wear.
- ▪Stringing: Many users noticed stringing with default settings. Adjusting retraction distance, lowering nozzle temperature slightly, reducing travel speed, and enabling combing in the slicer helped reduce it. Running a retraction calibration test also worked well.
- ▪Poor bed adhesion: Users saw models lift at corners or shift during prints. Cleaning the bed with isopropyl alcohol, using brims or rafts, and dialing in Z-offset live during the first layer helped keep things stuck down.
- ▪Noisy fans: The stock fans were loud for some owners. They swapped in quieter aftermarket fans with similar airflow to fix it.
- ▪Z motors out of sync: Some reported tilted layers on tall prints because the Z motors drifted out of sync. They added a sync belt or manually realigned the gantry before printing to solve it.
Comparisons with competing rivals
Here's a side-by-side comparison of large-format 3D printers from other brands that offer similar features and compete with the Anycubic Chiron.
| Specification | Anycubic Chiron | Creality CR-10 Max | Artillery Sidewinder X1 | Tronxy X5SA Pro |
|---|---|---|---|---|
| Build Volume (mm) | 400 x 400 x 450 | 450 x 450 x 470 | 300 x 300 x 400 | 330 x 330 x 400 |
| Max Print Speed (mm/s) | 60-80 (for best results) | 20–100 (recommended) | Up to 150 | ~100 (typical) |
| Frame Type | Aluminum frame | Aluminum triangle frame | Aluminum frame | Aluminum cube frame |
| Leveling | Matrix auto-leveling | BLTouch auto-leveling | Manual (BLTouch optional) | Auto-leveling (sensor) |
| Notable Features | Ultrabase bed, filament sensor, power loss resume, 260°C nozzle, 100°C bed | Dual Z-motor, filament sensor, dual power supply, power loss resume, 0.4/0.8mm nozzle | Direct drive, ultra-quiet steppers, dual Z, touchscreen, filament/power loss sensor | Touchscreen, dual Z, filament sensor, Titan extruder, lattice glass bed |
| Price Range | ~$400–$500 | ~$700–$800 | ~$400–$500 | ~$450–$500 |
Our final take
The Anycubic Chiron isn't just about size, it's about what you can achieve when you've got the space and flexibility to print big. Though it isn't going to win awards for print speed or fine detail, it nails the basics of large-format FDM printing. It has its quirks, like any printer, but most of them can be managed with basic tweaks and a bit of care. Once you've got it set up and dialed in, it delivers consistent, high-quality results that punch well above its price point.
If you've got the space and are ready to level up your 3D printing game, the Chiron is a reliable and rewarding machine. Just be ready to get your hands a little dirty because once you do, the creative possibilities open up wide.
1. Anycubic.com, "Anycubic 3D Printing" Accessed July 26, 2022.

Scott Gabdullin is a Canadian entrepreneur, investor, and marketing expert who has successfully combined his passion for technology and innovation with a love for adventure and exploration.
Scott brings 12 years of digital marketing experience and a hardcore work ethic to his new passion for 3D printing. If he is not working on this business, he is likely travelling and Overlanding across North America with his wife and 2-year-old son in their Jeep Rubicon.
Read more →